Share the timeline view with team members, stakeholders & customers
Say you’ve prioritized and planned the feature timelines and get a request for a bird’s eye view of the features and their dependencies from team members, external stakeholders, customers and other prospects.
We recommend using the save and share timeline view tool to share the progress with your teammates and stakeholders to keep them well-informed about where the product is headed.
Filter and Save the Timeline View
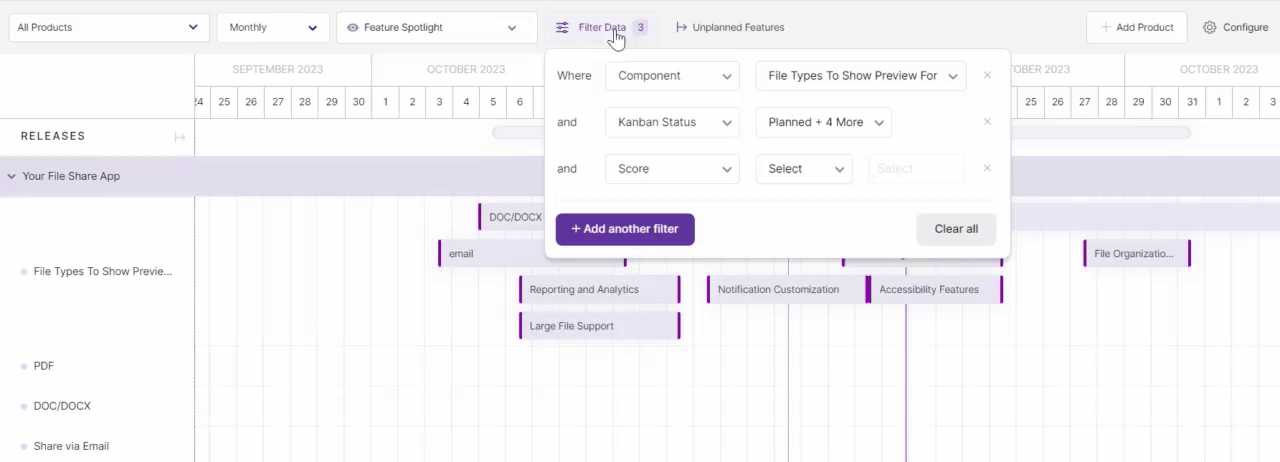
- In the Timeline view, filter the data using the filter tool at the top left of your screen
- Here, filter the features as per their score, statuses, and other factors.
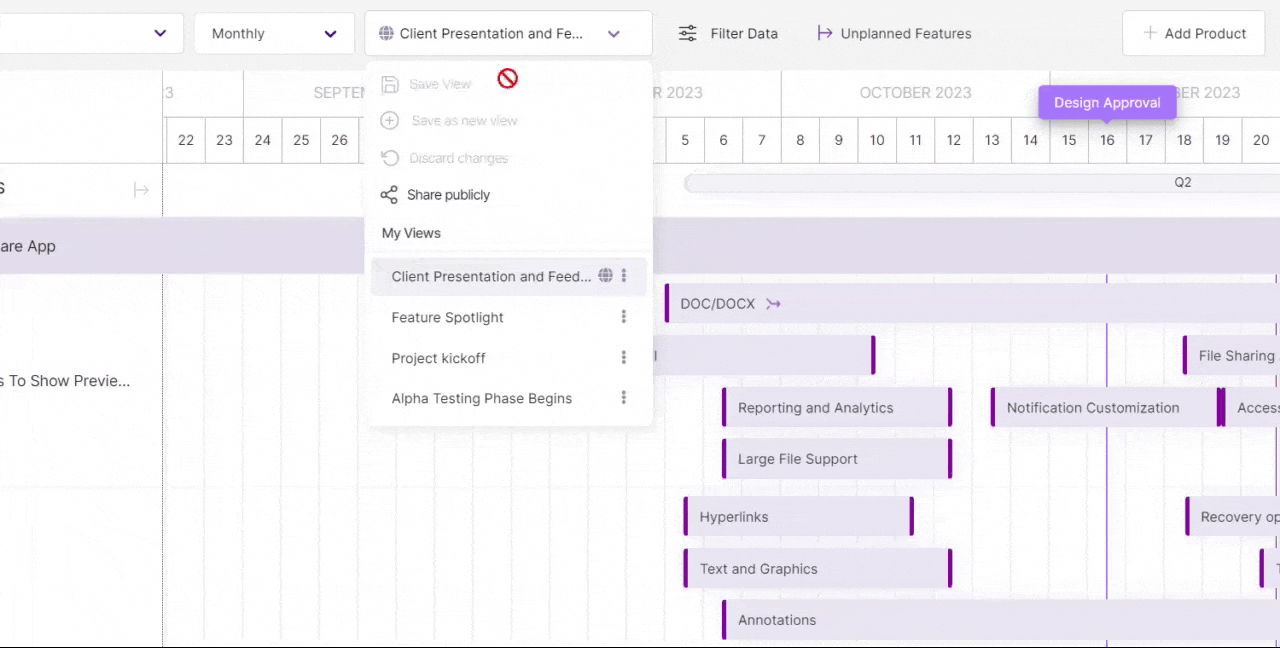
- Once you filter out all the necessary data, you can expand the ‘Views‘ tab to view all the options.
- Click on ‘Save view’ to save your existing view with the latest changes.
- However, if you wish to add a new view, click on ‘Save as new view.’ This will allow your existing view to be saved as a new view with the latest changes.
- If you wish to discard the latest changes, hit the ‘Discard changes’ button.
- All the views will be visible in ‘My Views.’
Rename, Duplicate and Delete a View
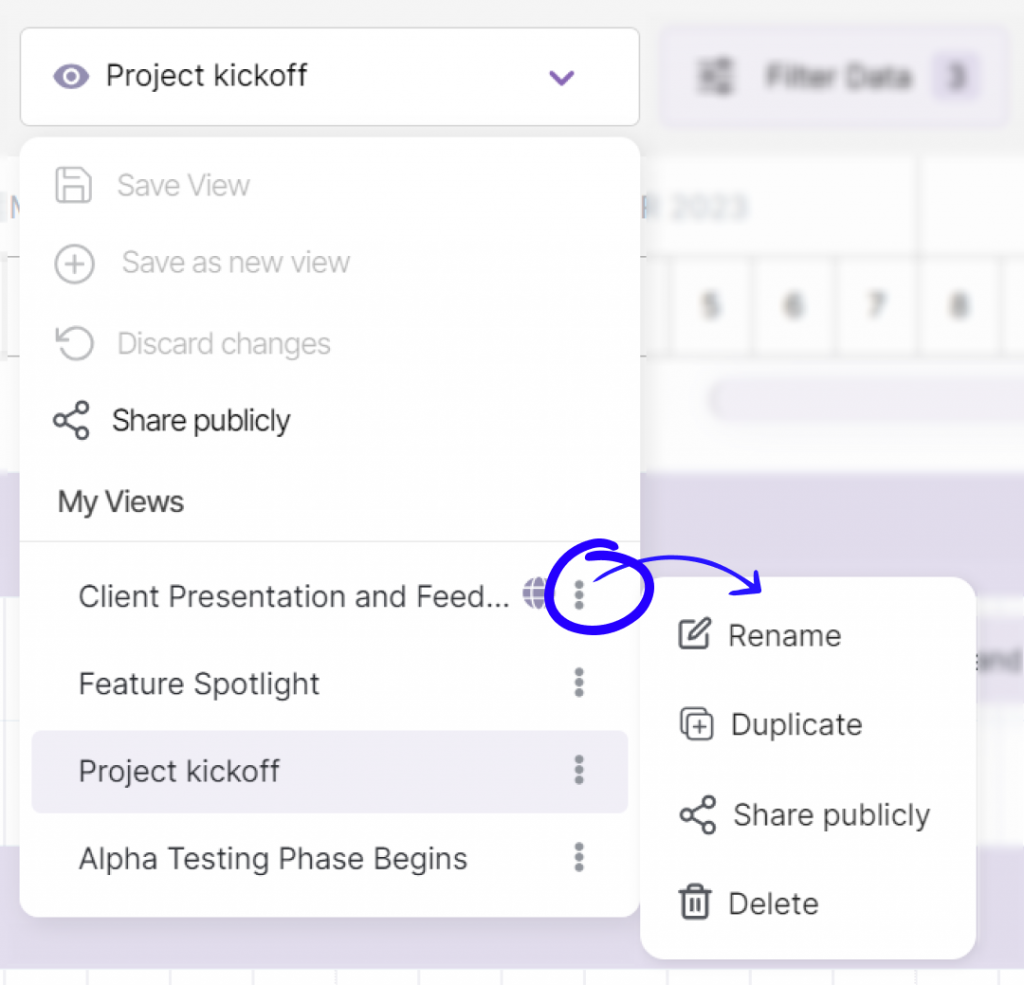
In your saved view list, additional options exist for renaming, deleting, and duplicating the view.
Note: Changes you make to a particular view will also be reflected for everyone with access to the view.
Toggling Between Views
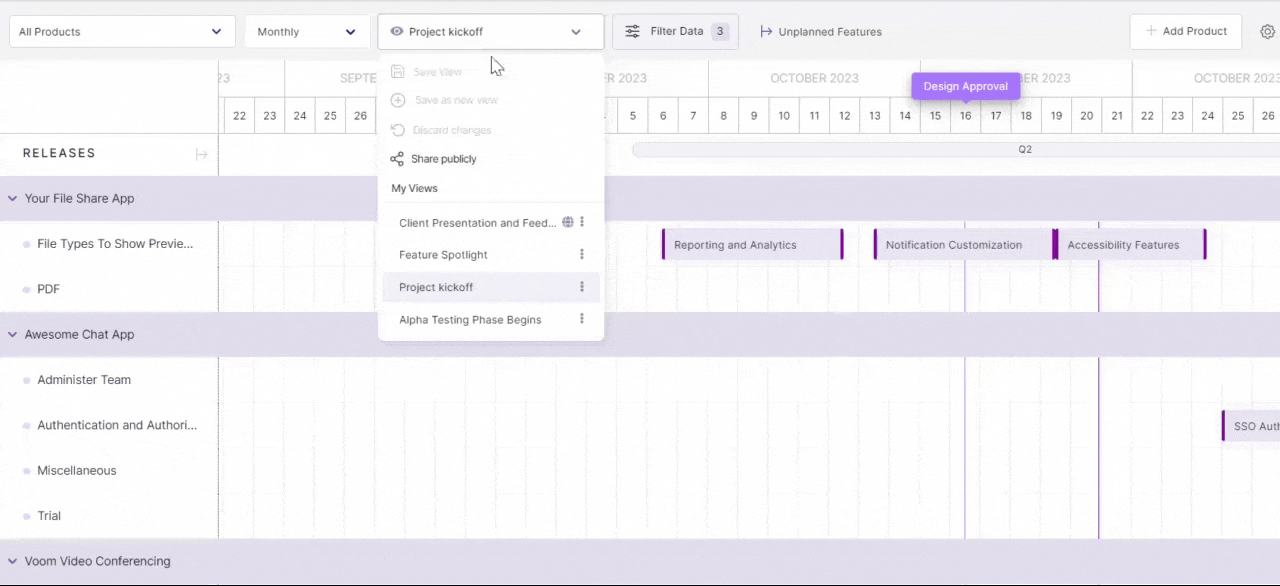
Switching between views is easier by searching the view’s name and clicking on it.
Pinning the Views
The Pinned View is a feature that allows you to access the most visited Treeview, Release, Kanban, Timeline and Idea Box Views at the top of the tool. This makes it easier for your team members to quickly access them without surfing through the entire list.
How to Pin a View?

- Locate the pin view by opening the three dot menu
- To revert to the regular saved views, and remove the view from the pinned section, click on unpin.
- To manage the pinned views, look at the top of the views. All your pinned views will be displayed here.
Sharing the Saved View
There are two ways to share the saved timeline view with your teammates, customers or stakeholders.
Share Internally With Teammates
Sharing the timeline view internally means it will be visible to only the teams who are a part of the workspace.
- To do so, click on the workspace URL of the view and share it.
Share Publicly With External Stakeholders and Customers
To share the timeline view publicly means you can share the link with people who aren’t part of the workspace but can still view the timelines of features.
- Go to the view, click on the ellipsis button
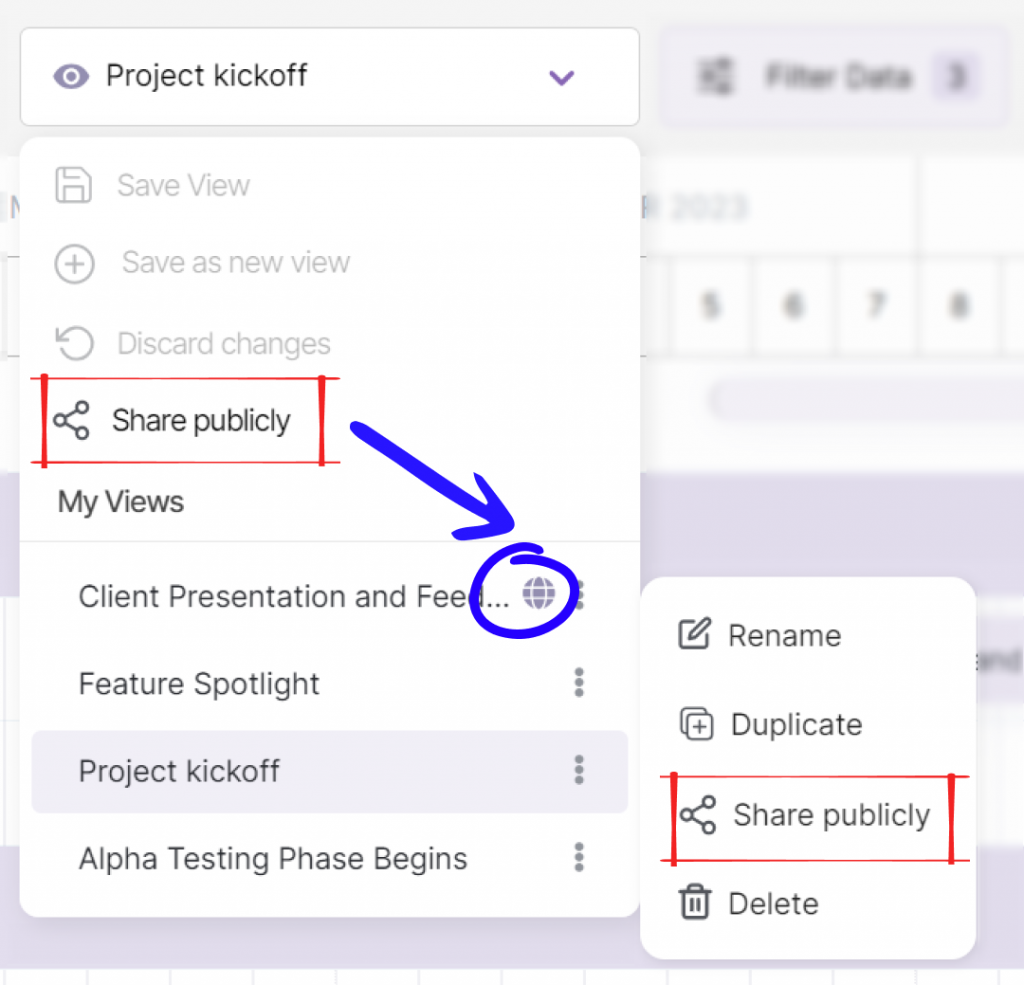
- Click on the ‘Share Publicly’ button.
- In the pop-up box, toggle the share publicly option from disabled to enabled.
- Now select the products you want to share publicly.
- Copy the public link
- Finally, send it across
Note: The views that are public will have a public view icon next to it.