How to Sort and Filter Features
With the help of the sort and filter options, you can better analyze and find your features. Only essential and filtered items will be visible, making your work efficient.
Pro tip: If you want to view all the data, make sure to check that the filter isn’t applied to your products.
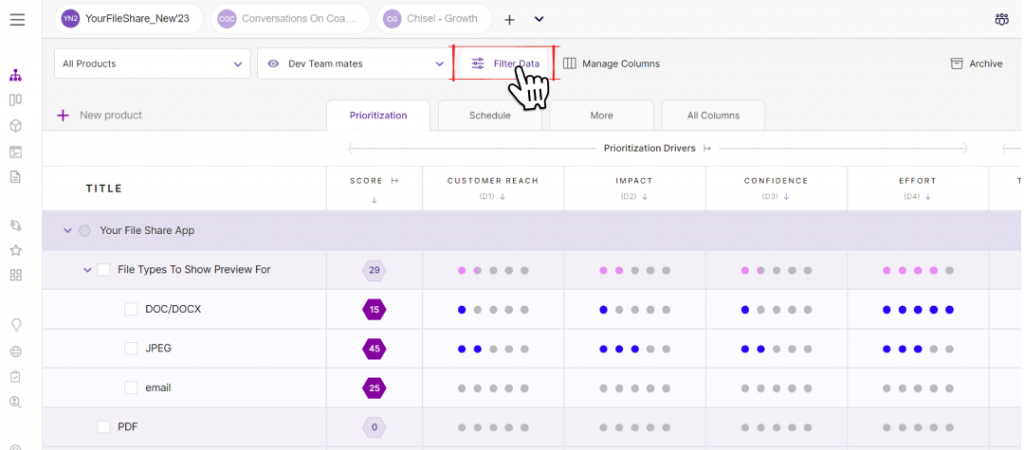
- A ‘Filter Data’ option is displayed on the top-left side of the page/workspace in Treeview, Kanban, Release, and Timeline view.
- Once you click on the filter button, you have several options to select from.
- To know ‘Where‘ your feature is situated, expand the ‘Score‘ button and select anyone from the score, kanban status, release status, member, dependencies, objectives, components, label, timeline, Jira integration, ADO integration, and all the custom fields.
- Once you select the ‘where’ part of your features, you will need to add other details related to the features.
- For example, if you select the ‘Score‘, then you will need to select if the score ‘is greater than’ or ‘is less than’ and then add the number in the box next to it.

- If you select any integration, then let the filter option know if integrations ‘Exists‘; or ‘Does not exist‘ for those features.
- The Timeline filter lets you select the ‘unplanned’ ‘after,’ ‘before,’ or the ‘range’ of time status of your features.
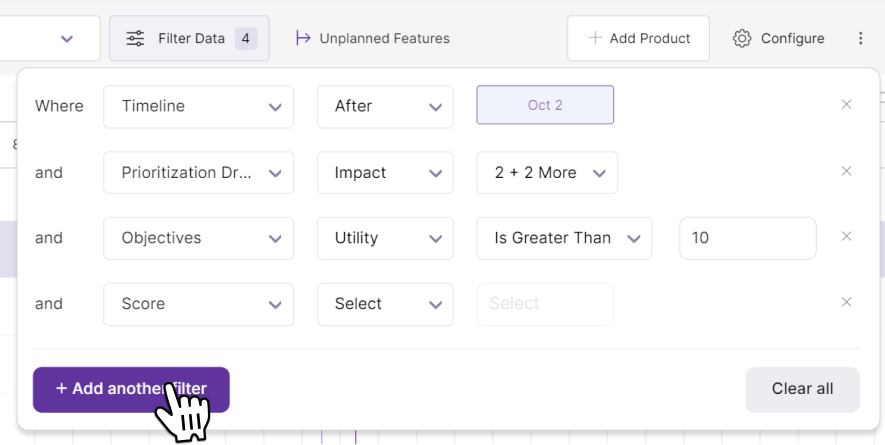
- After every filter, click on ‘+Add another filter‘ and move on to adding the next one.
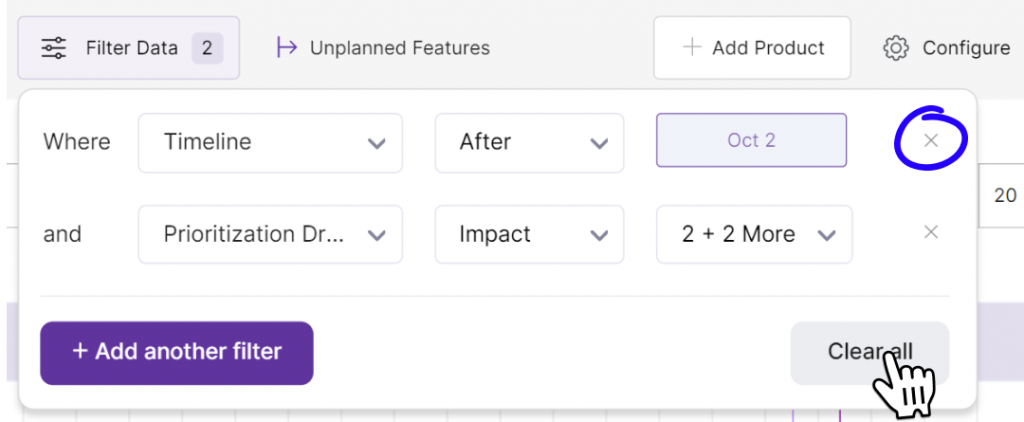
- Click on ‘Clear all‘ to delete the filters you’ve added, or click on the cross sign next to the filter you want to delete.