How To Perform Various Actions From Feature Side Panel
This article covers:
There are many action items you can perform from the feature side panel.
You can change the name of the feature, add/change the description of the feature, give values to prioritization drivers, change release, update kanban status, update objectives, update dependencies, add attachments, add members, add labels, move feature to Jira/Azure DevOps project and view activity on the feature.
How to Access the Feature Side Panel?
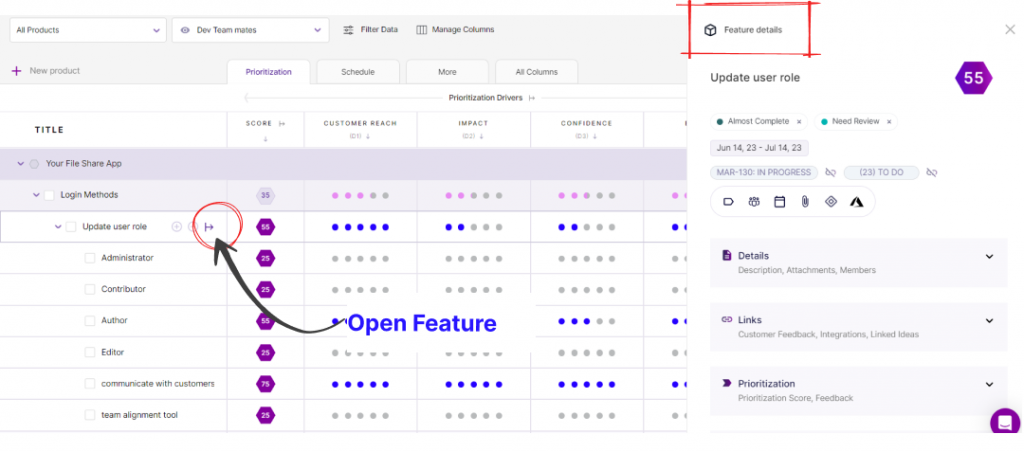
- When you click on the expand icon beside any feature in Treeview, you get to the Feature Side Panel.
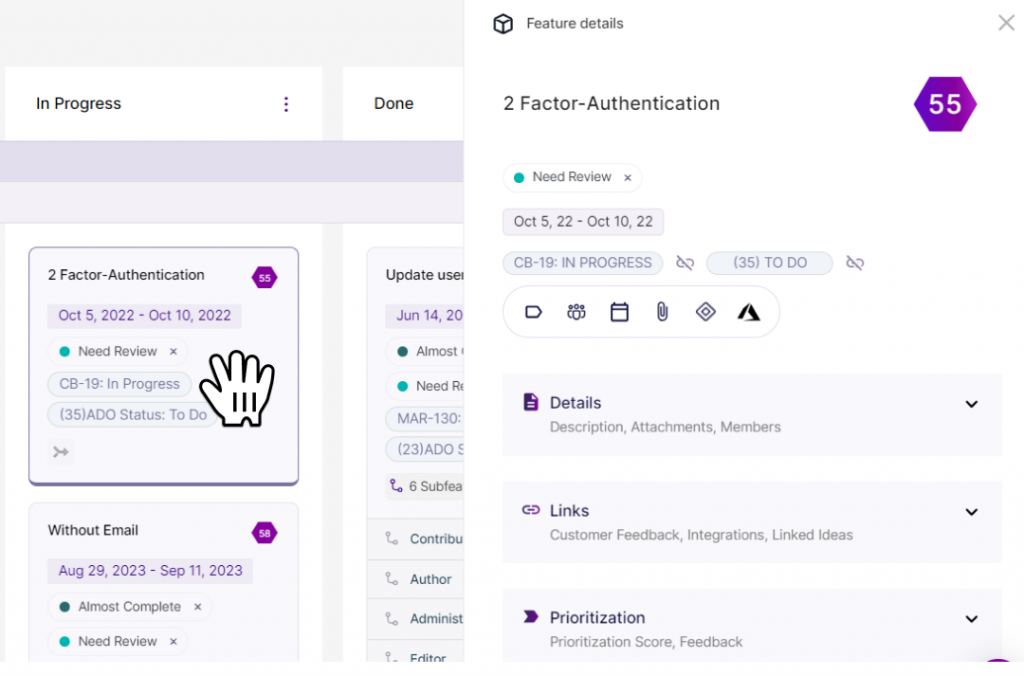
- To access the feature side panel in Kanban Board View and Release View, you can just click on any feature card or ‘see details’ and view the feature side panel.
- Details of sections and action items you can perform with the side panel are mentioned below.
Description
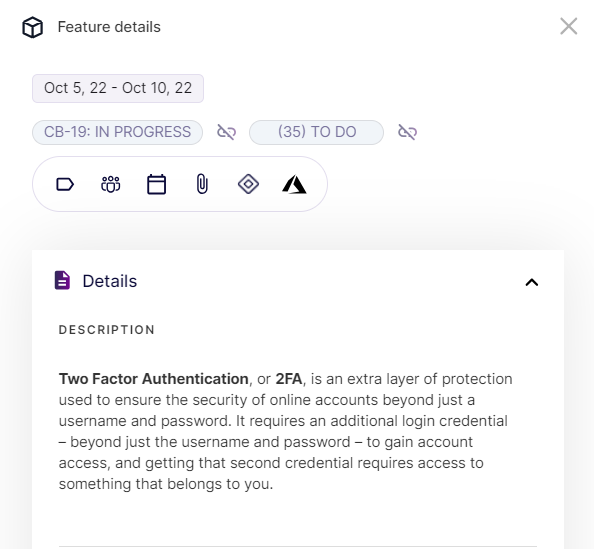
Under description, you can include a summary or explanation of all newly introduced features. This makes it easier for you and your team to comprehend what you’re working on.
Prioritization
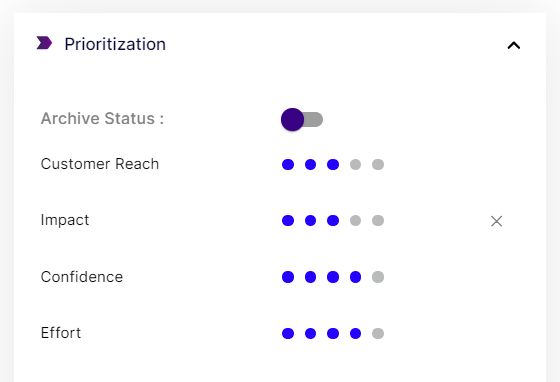
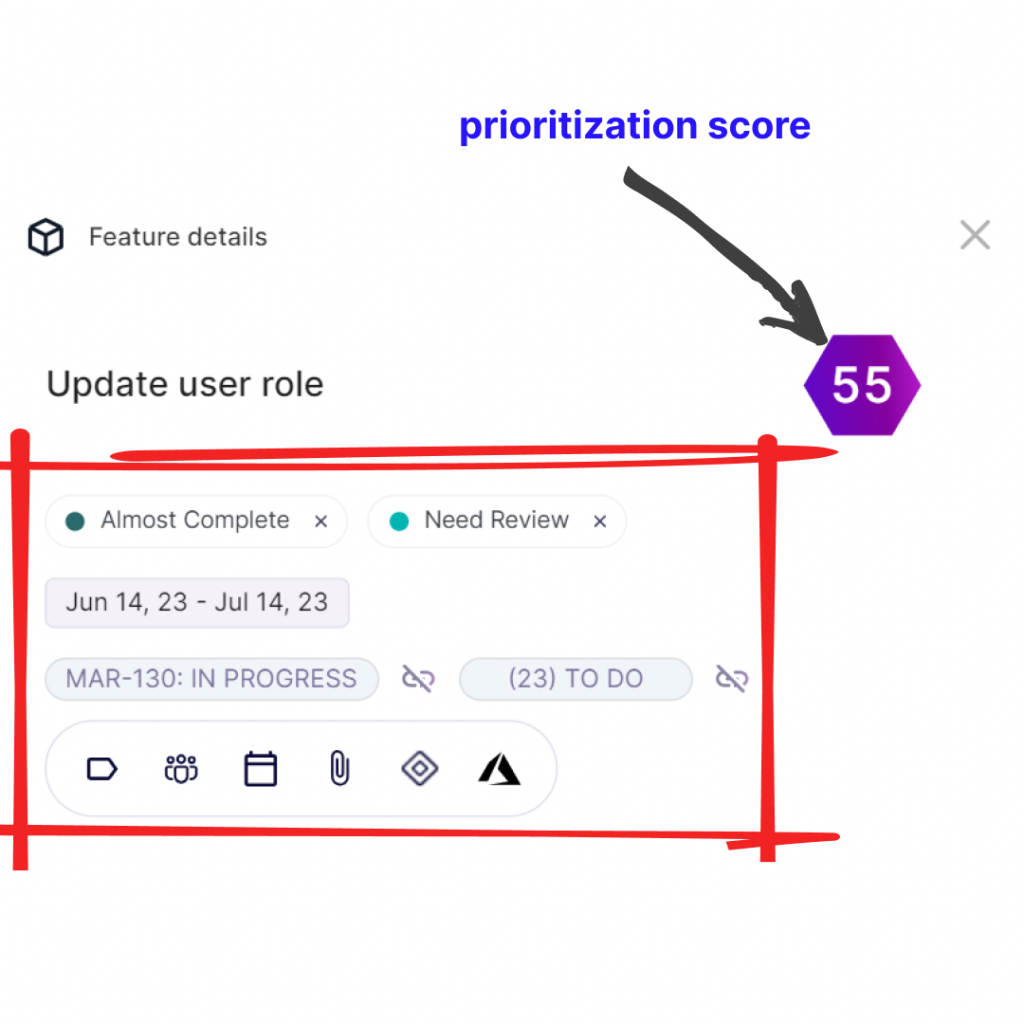
Inside the feature side panel, when you click on prioritization, you get to see the prioritization section.
Here you can update the prioritization drivers which are required to analyze each feature and provide a prioritization score. To calculate the overall prioritization score of any feature, prioritization drivers are taken into account.
Note: Tap here to learn more about the Prioritization score.
Feedback
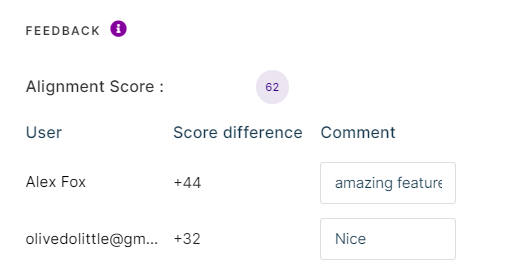
Next, you can see feedback your team members have assigned to the feature from Team Radar.
Schedule
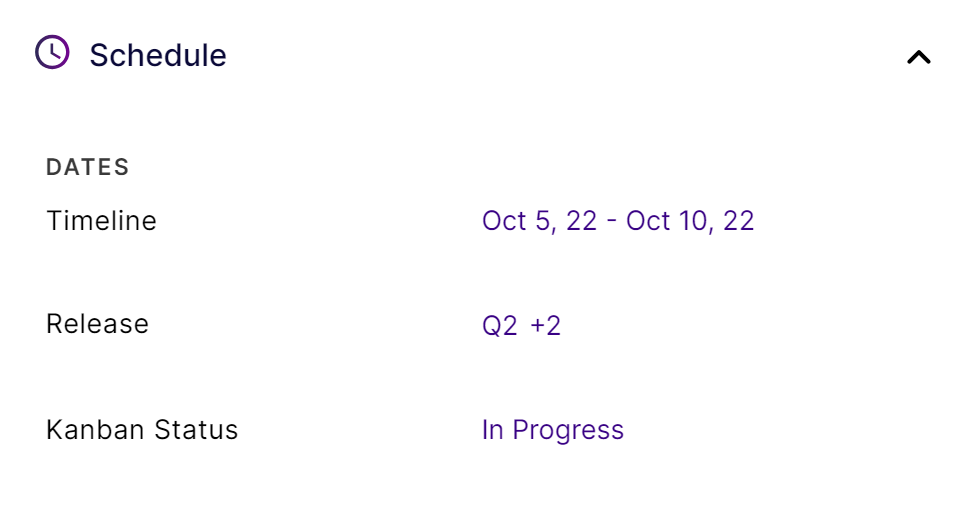
For every feature inside the Schedule section, you get to customize the timeline, update the release and update the Kanban status.
If you click on the ‘Timeline’ option, a calendar icon named ‘Edit date range’ will appear from which you get to set up the timeline.
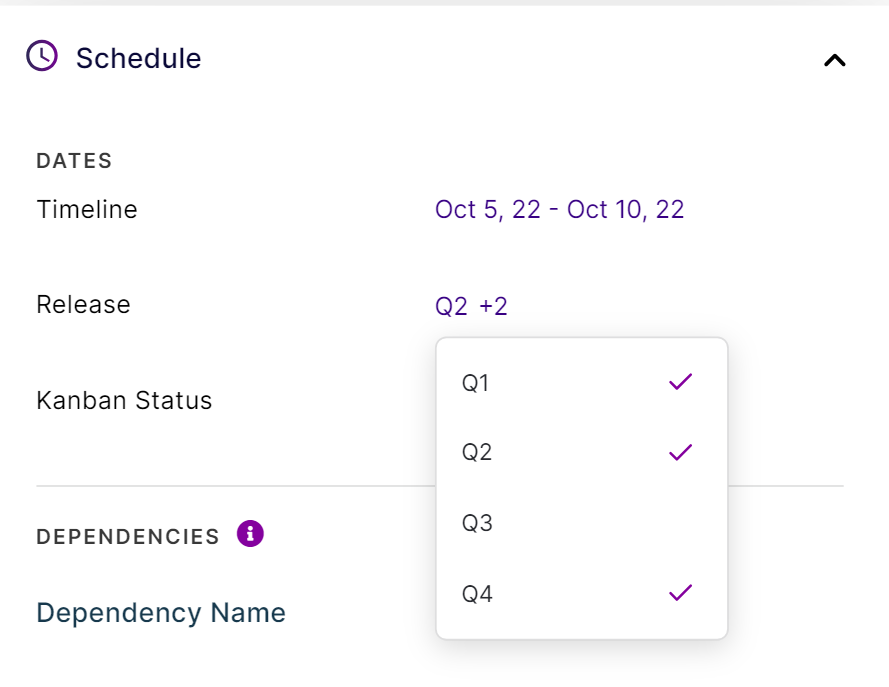
Next, when you click on the ‘Release’ option, you can select the release you want to update.
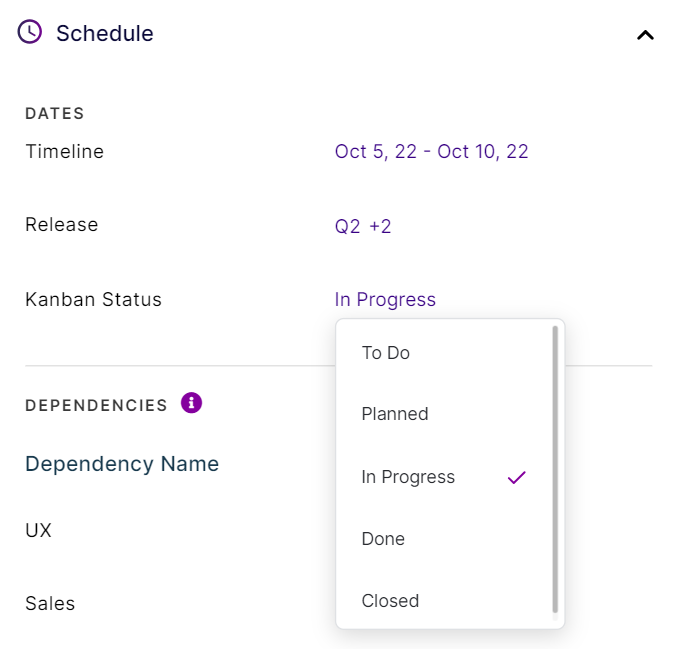
Finally, you have Kanban Status. Kanban status by Chisel is an excellent tool for your team to understand precisely the status of each item and align accordingly.
If you click on ‘Kanban Status,’ you can view the current status and even update it within seconds.
Dependencies
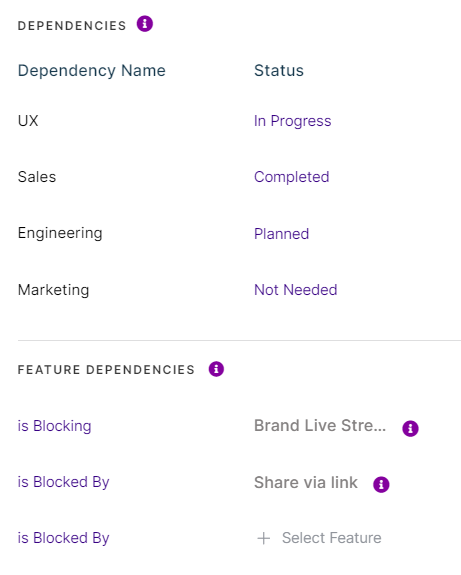
Another amazing option for you is updating dependencies. Sometimes you would collaborate with other teams like UX, marketing, and so on.
Thus, you can click on the drop-down beside each dependency name to update the status. If there is no need for any dependency, select ‘Not needed.’
Others
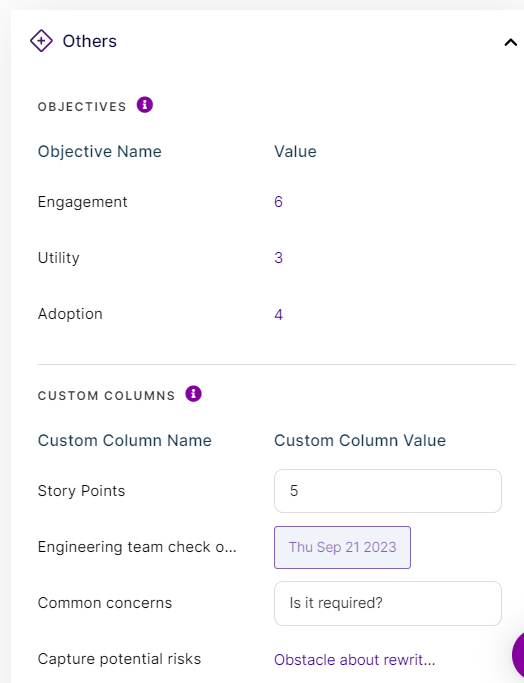
The third section is ‘Others.’ This section lets you update the Objectives value and check the custom columns.
The product lifecycle is driven by objectives, which show how different product features enable you to achieve your desired outcome.
Chisel allows you to define several objectives that you consider crucial, enabling you to evaluate multiple features and components quickly.
Note: Tap here to learn all about objectives.
Activity and Comments
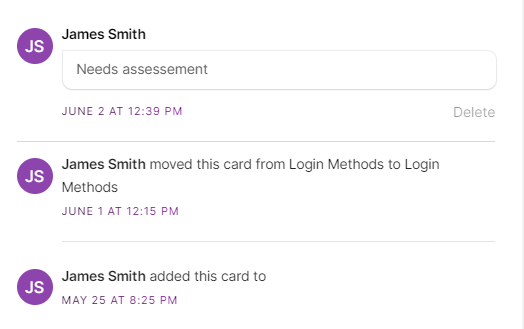
Following that is Activity. How much easier would it be to view all of the activities, such as the insertion or removal of any feature, without much effort?
Chisel has an option even for that. Activity shows what action you have done, with an updated date and time.
Menu Bar
At the very beginning of the side panel, there are a couple of quick icons. Let us go through what actions each one performs.
Add members
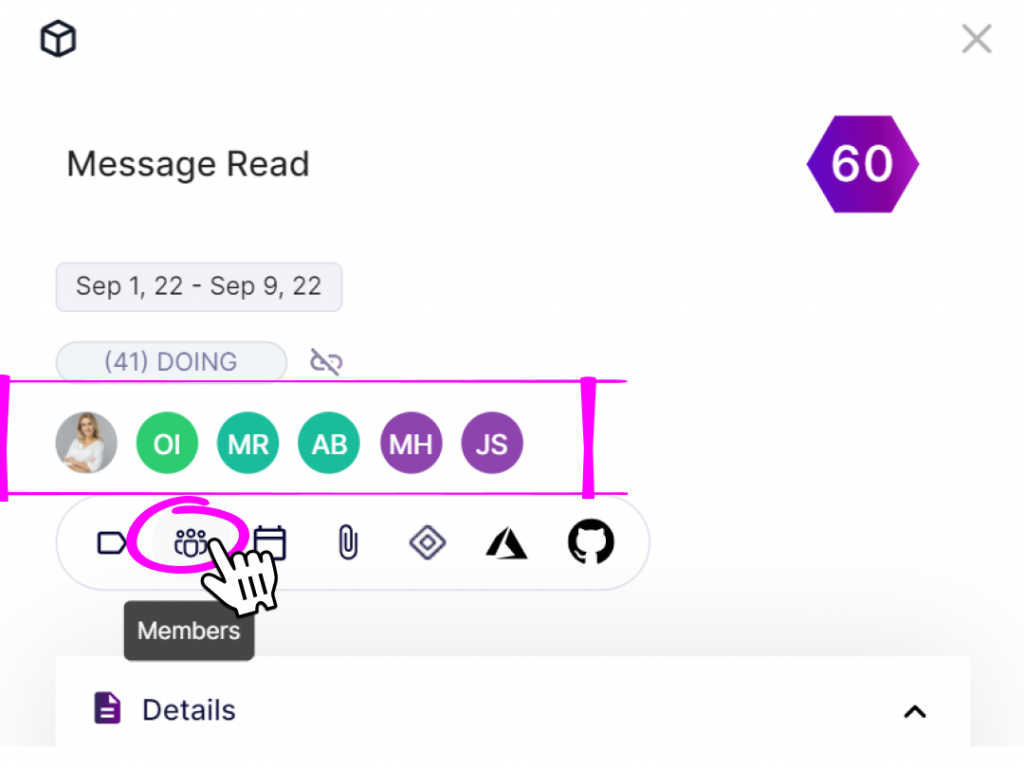
The first option in the sidebar is adding member/s option. When clicking on the icon, you get the team members’ names.
You can click on the team members you would like to add to work on that feature.
Labels
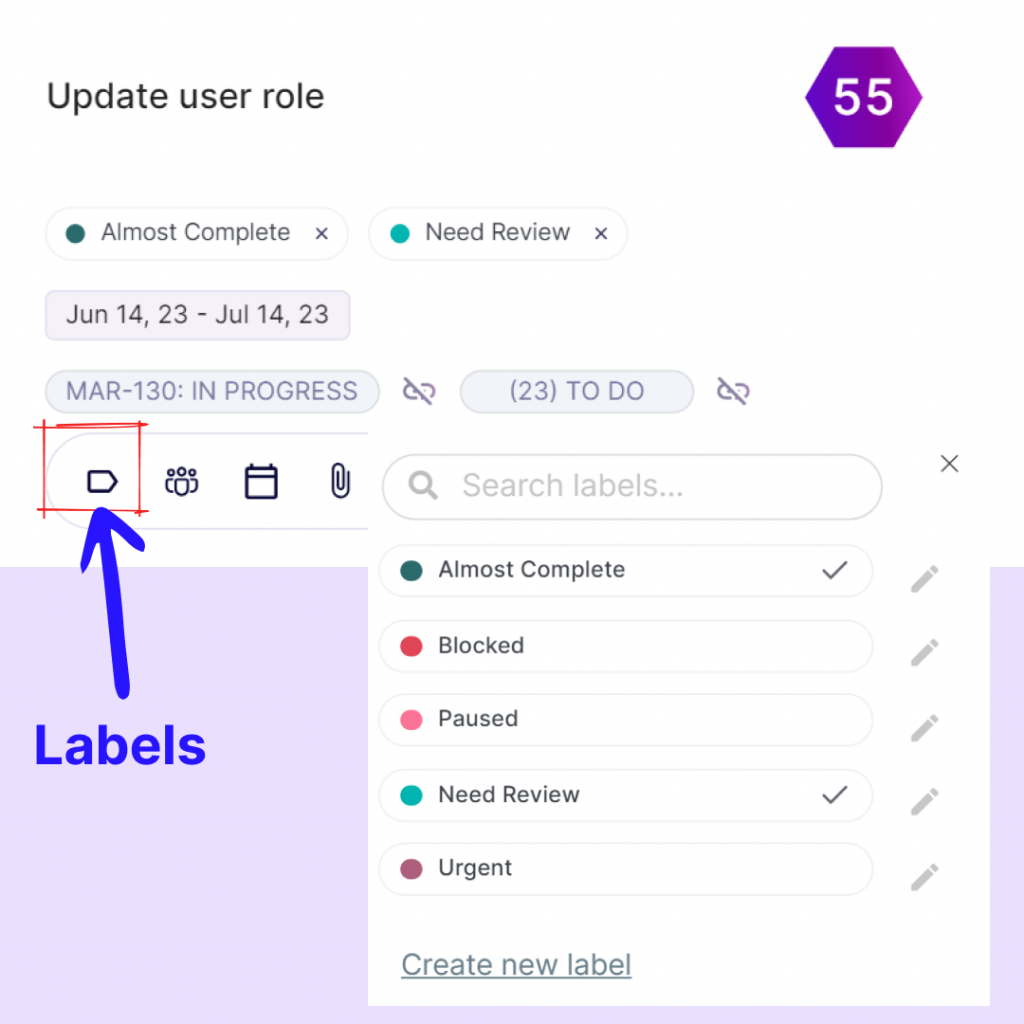
If you click on the ‘Label’ icon, a pop-up will appear, showing all the existing labels or actions.
You can also find the ‘create new label’ option where you can add any new significant action that you feel needs to go in there.
Timeline
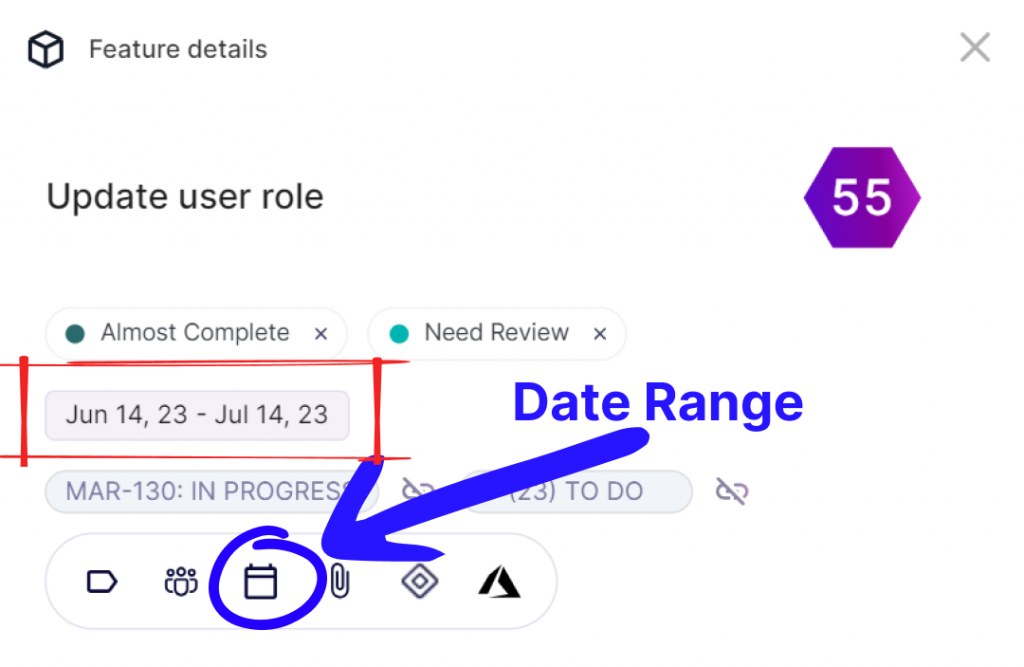
You can add/view/update the timeline for the feature from the ‘timeline’ icon on the side bar.
Attachments
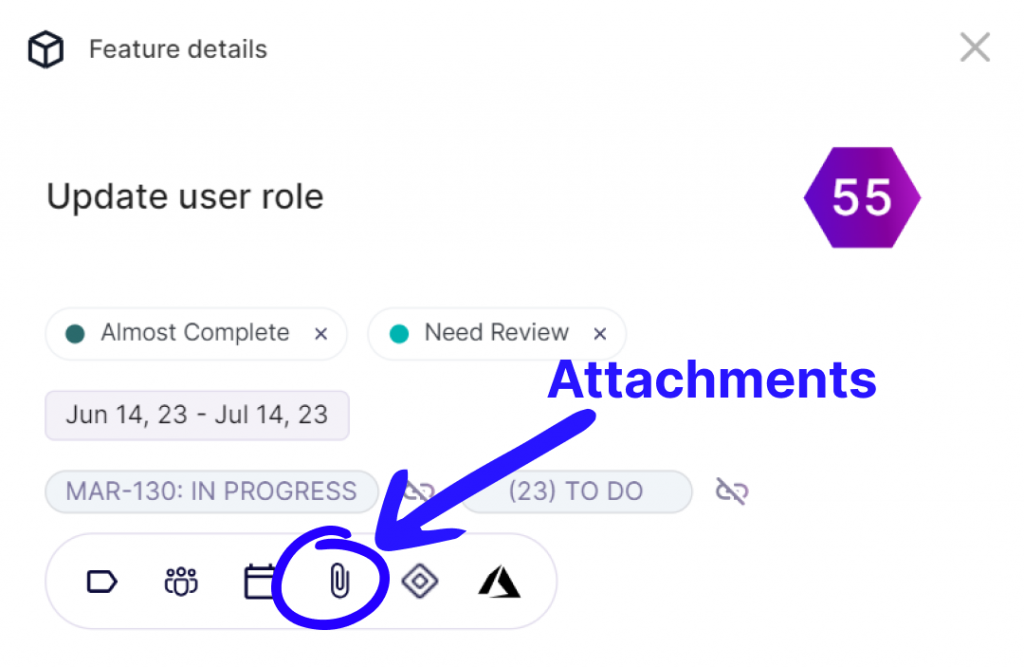
You can even add attachments by clicking on the ‘attachment’ icon on the side bar.
Now you can add any attachments (images, docs, and so on) for your reference.
Jira Integration
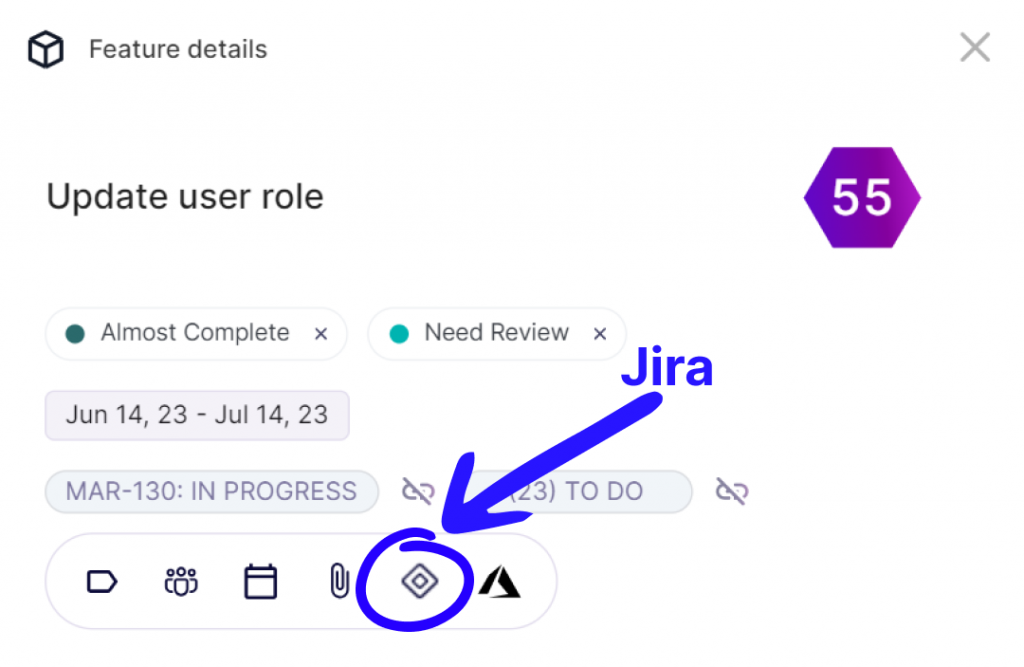
Using Chisel’s Jira integration, you can integrate your Jira and Chisel environments, ensuring that engineering team is in sync with the product team.
When you click on the ‘Jira’ icon, you get the Jira integration option.
You can select the project that you want to integrate.
It takes you to issue types which you can choose from.
Once you select the issue type, an issue is created in Jira and stays in sync with Chisel workspace’s feature.
Also, the synced status and issue types appear right below the description.
Note: Learn more about Jira integration.
ADO Integration
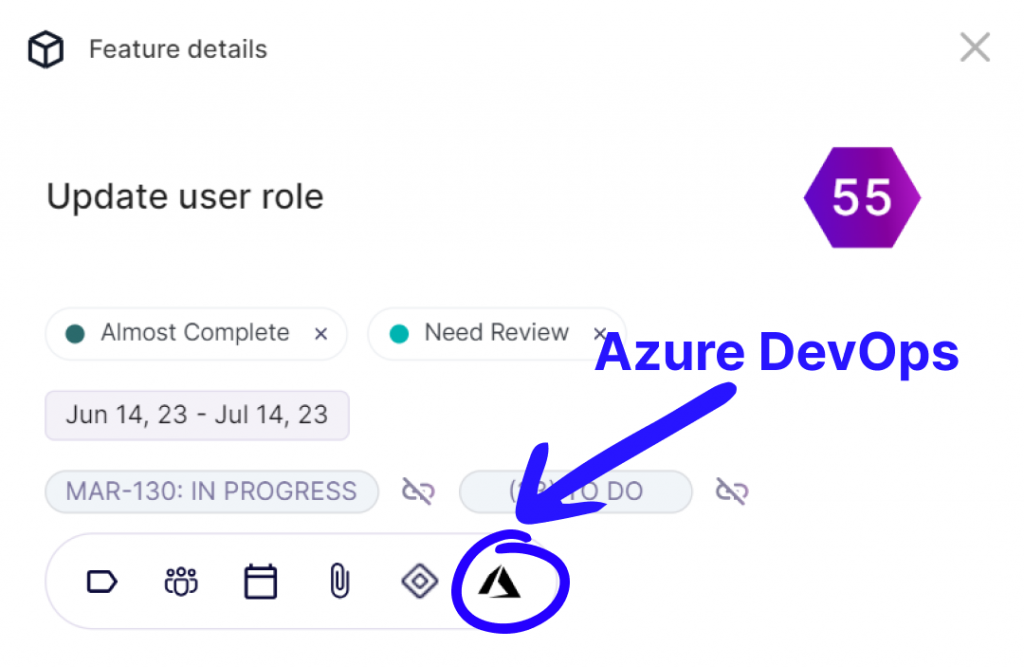
Azure DevOps allows teams to organize work, collaborate on code development, and develop and deliver apps using developer services.
Chisel’s Azure DevOps integration is ideal for keeping work items in alignment between the two platforms.
The ‘Azure DevOps’ icon in the sidebar is about Azure DevOps integration. The integration process is similar to Jira.
Here you can select the Azure DevOps project and choose from the Azure DevOps work item type, which creates a work item in your Azure DevOps workspace that is in sync with the Chisel workspace’s feature.
Also, the synced status and work item types appear right below the description.