How to Use the Timeline View?
This article covers:
- What is a Timeline?
- How to Access the Timeline View in Chisel?
- How To Assign Timelines?
– Assign Timelines to Releases
– Assign Feature Dependencies
– Assign timeline automatically
– Timeline Configurations
– Zoom In and Zoom Out
– Other Sections of the Timeline - Configurations
- Rearranging Feature Timeframe and Order
– Export Timeline data
– Milestones
What Is a Timeline?
Timelines help companies stay on track and get their projects completed on time. They also help teams avoid surprises and make sure you have enough time to make changes if needed.
A timeline is essential in the product management process as it helps create a plan and organize the project’s tasks. It also helps to coordinate and manage different teams involved in the project.
You need to have a timeline that aligns with the company’s goals and objectives. The timeline should also be flexible enough to accommodate changes throughout the project.
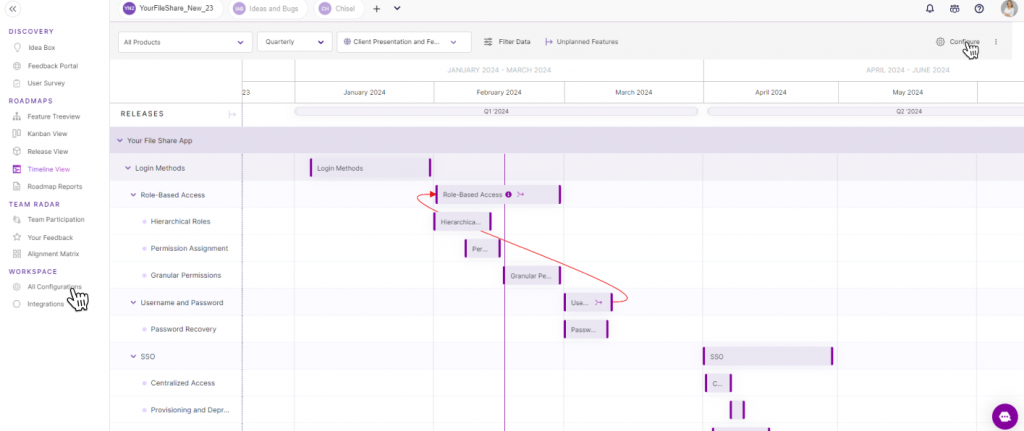
How to Access the Timeline View in Chisel?
- To view the timeline, go to your workspace.
- Now select ‘Timeline’ in the ‘Roadmaps’ pillar on the left-hand side of the navigation board.
- You will see a screen with components corresponding to features and your assigned timelines.
- To view the timelines corresponding to each feature, go to Treeview, and click on ‘Schedule.’
- Here, you can view, change or remove the timelines. Simply click on the timeline, and the ‘Edit date range‘ box will appear.
- Save or remove the timeline as per your requirement.
- If you want to hide the Timeline tool from the Treeview, simply toggle it off in the side panel of the Treeview.
How To Assign Timelines?
- First, go to the ‘Treeview’ action in your workspace. Select the feature you want to schedule.
- Once you hover over the feature, select the ‘Open feature’ icon.
- The feature side panel will appear. Here select the ‘schedule’ tab.
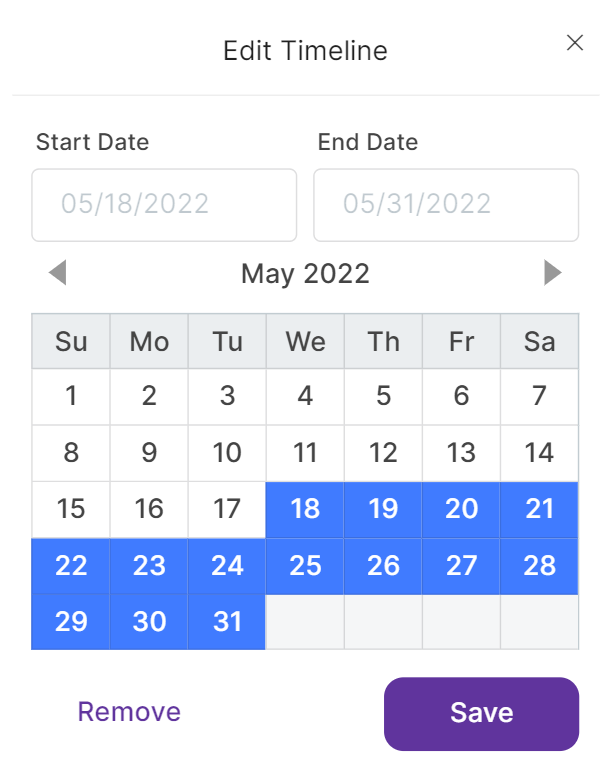
- A rectangular bar next to the ‘timeline’ will let you assign dates: start and end dates to your features using the ‘Edit Date Range’ option.
- Select the start and end date from the displayed calendar. You will see the blue patch for your selected date range. Confirm it once, and then click on ‘Save.’
- Your features will be visible in the ‘Timeline’ view.
- To add a new feature to the timeline, go to the ‘Timeline’ section, and click on the date range you want to add the features.
- A separate box with ‘Add feature’ will appear.
- Here, ‘Name’ your feature, add a timeline and description, then click on the ‘Add’ button.
- You can also automatically view the new feature in the ‘Treeview’ section.
- To remove/delete the feature from Treeview, simply remove the time range.
Assign Timelines to Releases
The high-level release schedules help organizations communicate their product development and update strategies effectively.
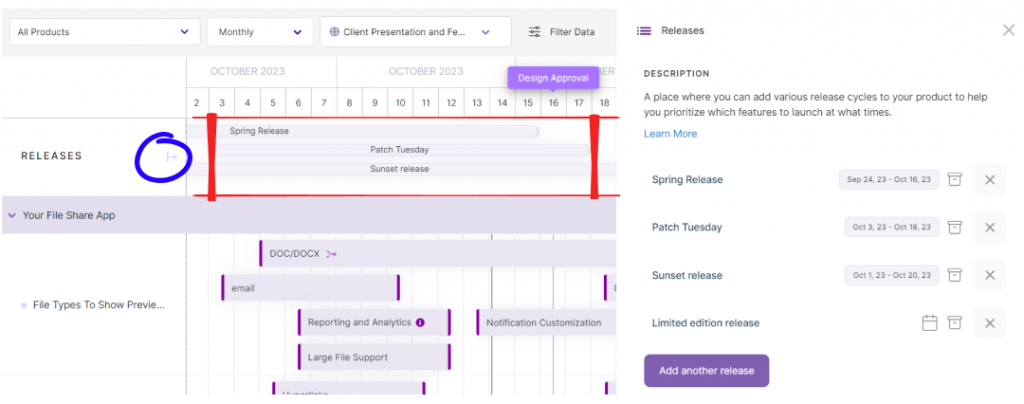
- In the Timeline view, at the very top of the view, you’ll find the Releases.
- Open the Releases, a side panel appears
- Here, you can view all your product releases.
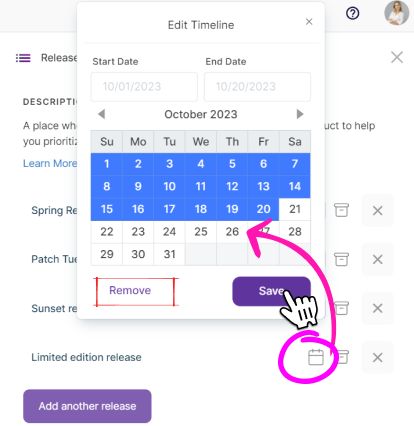
- You can add the timelines by clicking on the date range icon.
- To remove the timeline, click on the remove button.
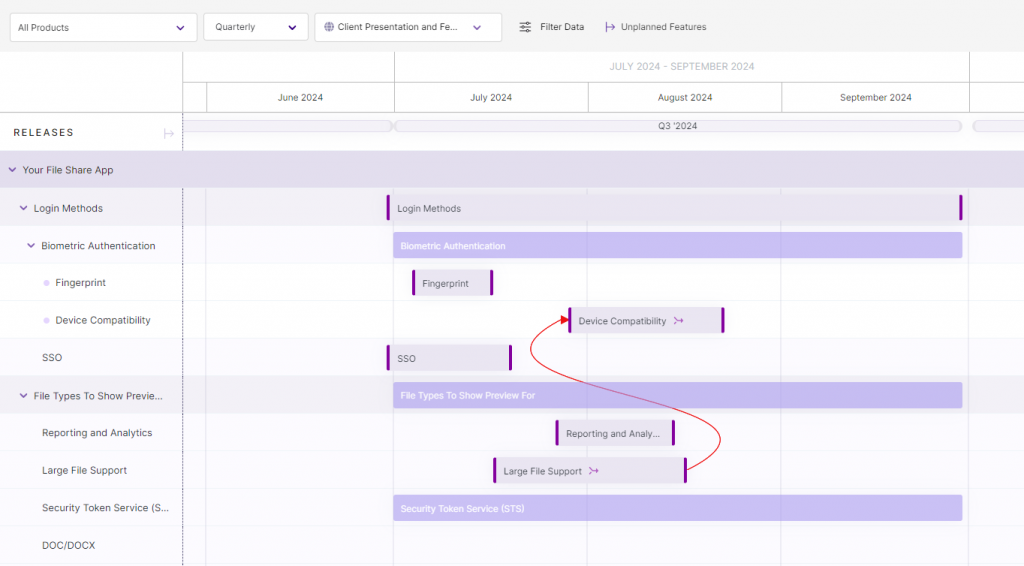
Assign Feature Dependencies
Add feature dependencies and visualize which feature depends on which one, plan your features and give your team the clarity they need.
Learn more about dependencies.
Assign timeline automatically
This tool comes in handy when you don’t have a timeline assigned to a component/feature/sub-feature yet would want to view it in the timeline view. It can be that that feature is completed and the release is in the pipeline.
Assign the releases to these items and they would be visible under those releases.
Note: Components & Features can have multiple Releases. Subfeatures can only have one Release assigned to them.
Timeline Configurations
Show sub-features with timelines assigned
Note: Sub-features functionality is available on Premium and Enterprise plans
You can have a glance at the sub-features in the Timeline view(only the ones that have the timelines added to them) by toggling the show button and hiding it from the view when not needed.
Show all features with/without timelines assigned
Hide and Show all the subfeatures with/without the timelines they’ve been assigned.
Zoom In and Zoom Out
- To better view your timeline, you can select the options: Weekly, Monthly, Quarterly, and Yearly from the bar at the top of the page to view the timeline according to your requirements.
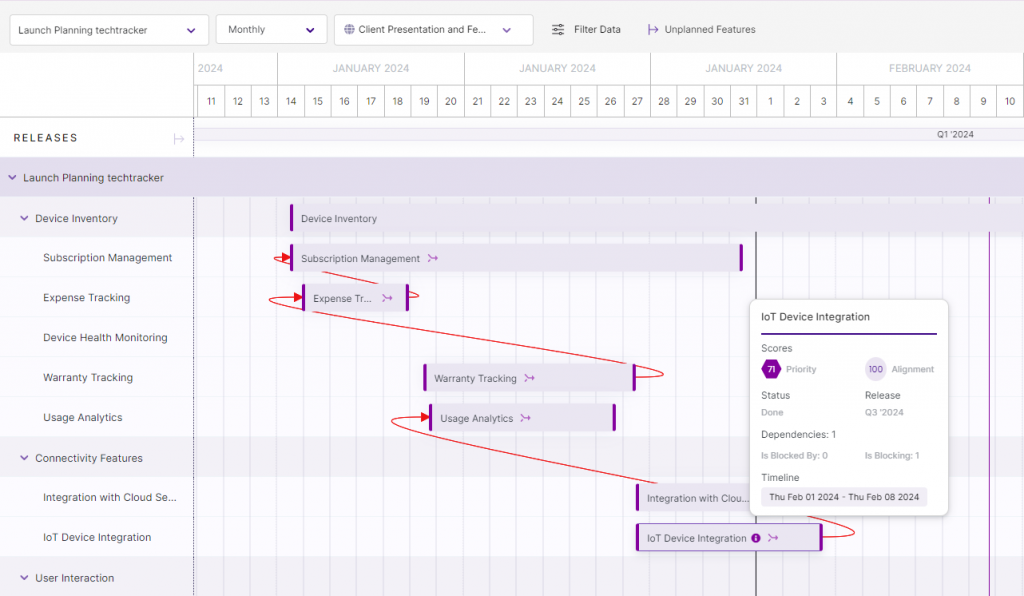
Other Sections of the Timeline
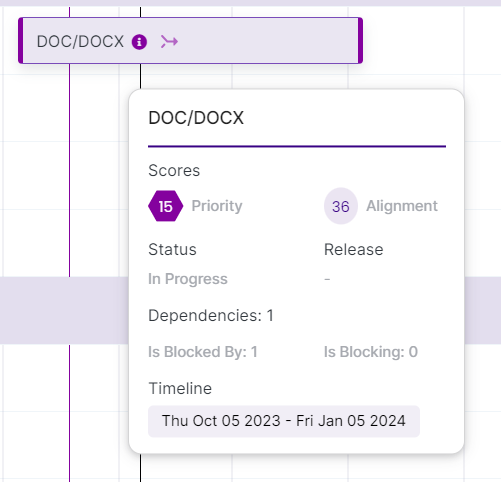
- You can simply hover over the ‘i’ icon on the said feature to get information like ‘Priority Score,’ ‘Alignment Score,’ ‘Kanban Status,’ ‘Release Status,’ and ‘Timeline’ of a particular feature in the timeline view.
- In cases where more information is needed to make decisions, you can click on the feature. Doing so will open the feature side panel. Here you can see the broader view of the feature, such as dependencies, feedback score, and so on.
Configurations
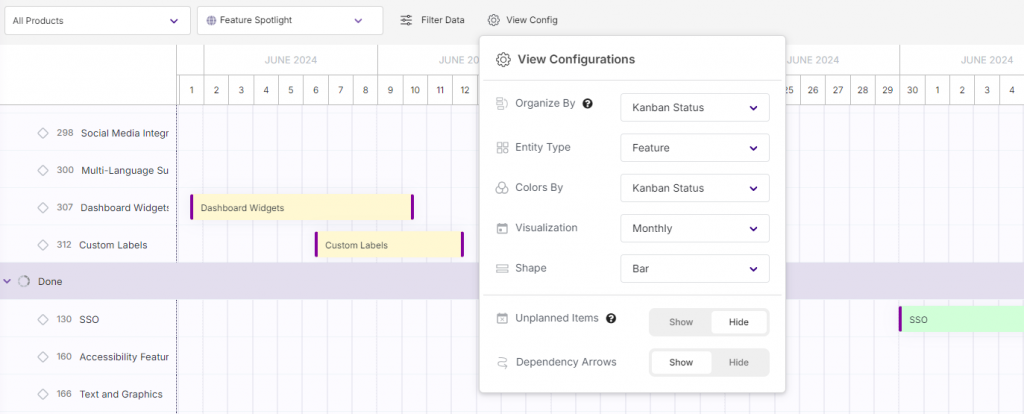
Timeline allows you to configure it as per your visualization. The options to customize are: changing the shapes, colors, customizing the screen w.r.t the week, days, years, deciding to show the dependency arrows and unplanned items etc.
Read on timeline configurations.
Rearranging Feature Timeframe and Order
- Another shortcut to extend or shorten the timeline of your features instead of going to the ‘Edit Date Range’ tab is to bring your cursor to either end of the feature bar.
- You will notice the drag cursor appear. Extend or shrink your features as per the requirements.
Export Timeline data
- To export your ‘Timeline’ data and store it in a PDF format, click on the ‘Ellipses’ button at the top right corner of the ‘Timeline’ page.
- Click on Export
- A bar with ‘Create a PDF’ will appear.
- You can edit the name of the PDF in the given box.
- Now click on the ‘Export’ button.
- You can view a PDF file of the timeline data in your ‘Downloads’ folder.
- Click on the ‘Done’ button to resume your timeline work.
Milestones
The timeline view also lets you add milestones. Click here for more information on how to go about using milestones.