How to Use the Feature Treeview
Chisel’s Feature Treeview gives users an easy way to go about and rate the various features that they are working on and thinking of adding to their product.
Determining what features or initiatives should be prioritized in your products can be a daunting task.
Using Chisel’s treeview can help make the process more collaborative and efficient. It also aims to help you get back to crafting amazing products.
Features and Components
Your project is divided into smaller groups in Chisel: components and features and sub-features(for enterprise users).
Features can be any small task or initiative with a specific end goal in mind.
Components are groups of features that are related or have similar goals.
- In order to add a feature to your product, you first need to add a component.
- To add a component, click on the plus button next to your project and a textbox will appear. This will give you the opportunity to enter the name of the component.
- To save the component, press enter key on your keyboard.
- If you wish to add more components, simply keep putting them into the product and pressing enter.
- Once you are done entering components, simply click off the textbox.
- The process of adding a feature is identical to adding a component. But instead of clicking the plus button next to the product, click the plus button next to the component.
Create your product hierarchy in Chisel
- Once you enter the features you want for your product into the treeview, you can rate them and organize them into a specific release.
- Don’t forget to see at a glance what still needs to be done in order for a feature to be finished.
Categories in Treeview
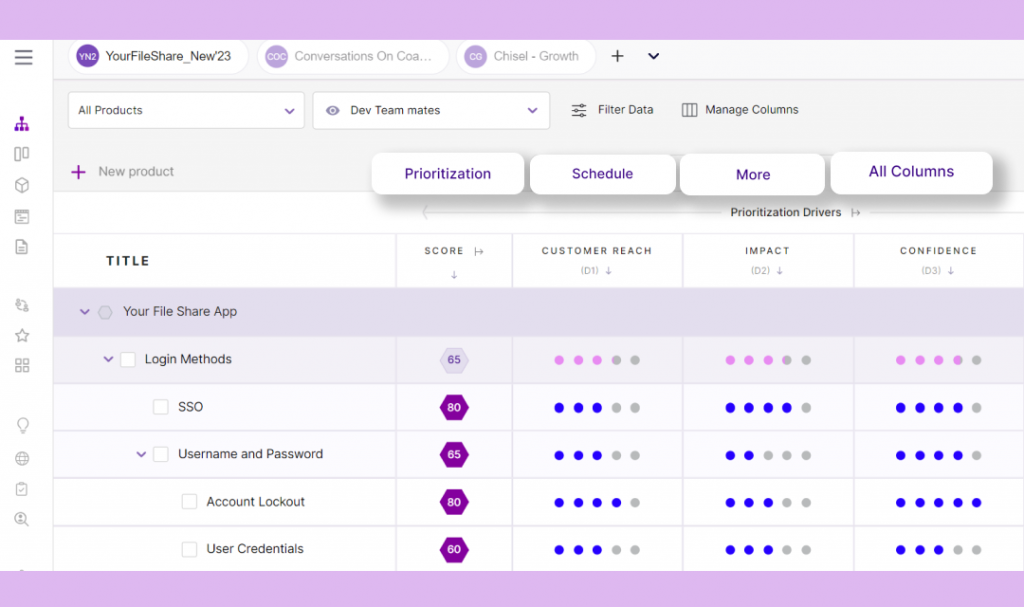
- The treeview section is divided into four categories. These columns are: ‘Prioritization‘, ‘Schedule‘, ‘More…‘, ‘All Columns‘.
- If you want to add the prioritization drivers, go to the ‘Prioritization‘ column.
- If scheduling Kanban, Release statuses, and Timelines are your goals, click on the ‘Schedule‘ column.
- The ‘More…‘ column stores your ‘Objectives,’ ‘Dependencies,’ ‘Integrations,’ and ‘Custom columns.’
- Currently, for ‘Integrations‘, you can add statuses for two integrations, Jira and ADO, corresponding to each feature. Simply click on the ‘+‘ icon and select the status accordingly.
- To get a birds-eye view of all your columns at once, click on ‘All Columns.’
Rating Features and Prioritization Score

Any feature in Chisel can be rated along with a few different categories:
Customer Value, Customer Reach, Revenue, and Effort. These four different categories make up a composite prioritization score that can be used to judge features against one another at a glance.
Customer Value is a rating based on how useful an individual feature will be for the end-user.
Customer Reach is a rating based on how useful an individual feature will be for customer acquisition.
Revenue is a rating based on how impactful an individual feature will be on profits for your organization.
The effort is a score that is based on the amount of time in person-days a task will take to complete.
- In order to assign a value for Customer Value, Customer Reach, and Revenue, just click on the bubble corresponding to the rating for the category.
- The aggregate score formula can be adjusted if you feel that one category is more important than the rest.
- In order to see this difference, click on the Score text at the top of the column, and a side panel will appear, letting you adjust the values.
- Once you rate all the features in a component, an average customer value, customer reach, revenue, effort score, and aggregate score will be calculated for the entire component.
Learn more about the prioritization drivers
Objectives
Chisel also supports letting you add various objectives that you feel are important, giving you the ability to compare various features and components against each other at a glance.
- In order to add an objective, click on the objective text at the top of the section, and a side panel will appear, giving you the option to add, delete, or hide various objectives.
- In order to hide an objective, click on the toggle corresponding to the objective you want to hide.
- Take note of how once the Increase Engagement was toggled off, the objective was hidden from view in the treeview.
- To add an objective, click on the “Add another objective” button. Once you do, a text box will appear giving you the ability to type in the name of the objective and save it.
- To delete an objective, you can simply click on the trash button corresponding to a specific feature.
- Once you have the objectives that you want you can rate a feature by either clicking on the plus button if the feature has not been rated or the old score.
- Once you do a field will appear giving you the option to assign a score that you feel is appropriate.
- If you have assigned a score and want to delete it you can do so by clicking on the column corresponding to the objective and a side panel will appear.
Releases
In addition to Objectives, Chisel also supports releases letting you easily plan when you want certain releases to be scheduled and what features you want in those releases.

- The adding, hiding, and deleting releases are identical to adding objectives. The only difference between releases is how you assign a feature to a release.
- In order to assign a feature to a release simply click the checkbox that corresponds to a specific feature.
Feature Side Panel
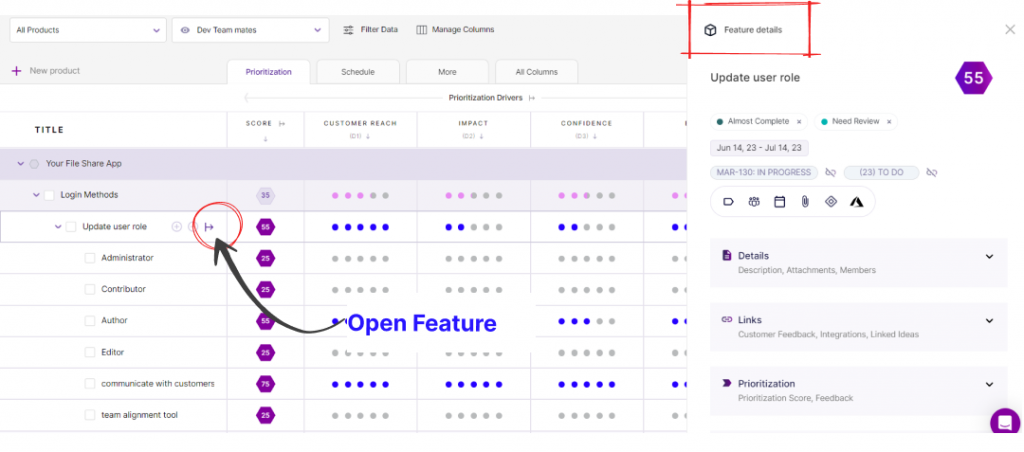
- In addition to all the aforementioned functionality of features and the treeview, features in Chisel are even more powerful thanks to the feature side panel.
- The feature side panel gives users the ability to add start and end deadlines for features, assign certain members of your team to a feature, add labels, attach documents that may be useful, and see how a feature was scored in all categories at a glance.
- At the top of the sidebar, there is a text field where you can enter a description if you choose not to add one earlier or change an existing description.
- To enter a description, click the text field and write the description, then click save.
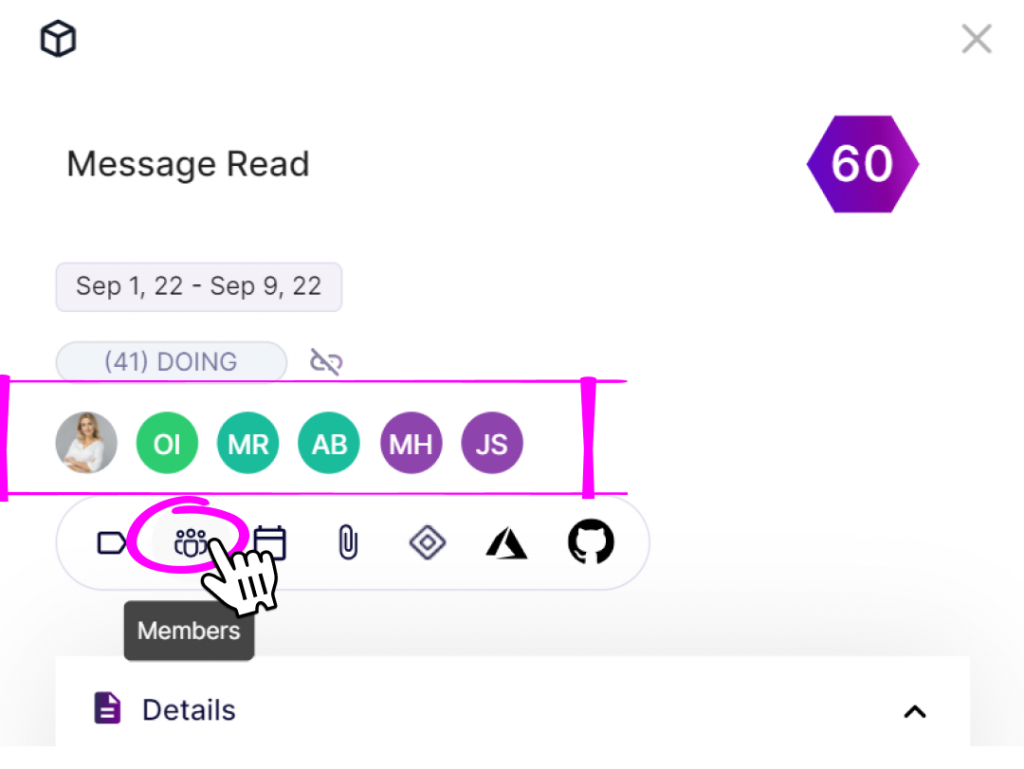
- In order to assign people to a feature, click on the people button on the right, and a popup will appear with a list of people in your organization.
- Once the popup appears, click on the person you want to assign to the feature.
- In order to add a label, click on the tag on the side.
- Once you do that, a popup will appear, either letting you add a preexisting label or create a new label.
- Creating a new label requires choosing a color you want with a title you like and then clicking on the ‘Create label‘ button.
- To add the timeline (start date and end date) for a feature, you can either click the top calendar or the start date in the panel for the start date or the bottom calendar or end date for the end date.
- Once you do, click either of them, a calendar will appear, letting you select the dates that correspond to your start or end date.
- Then, simply click save, and the start or end date will be saved.
Multiple Product Selection
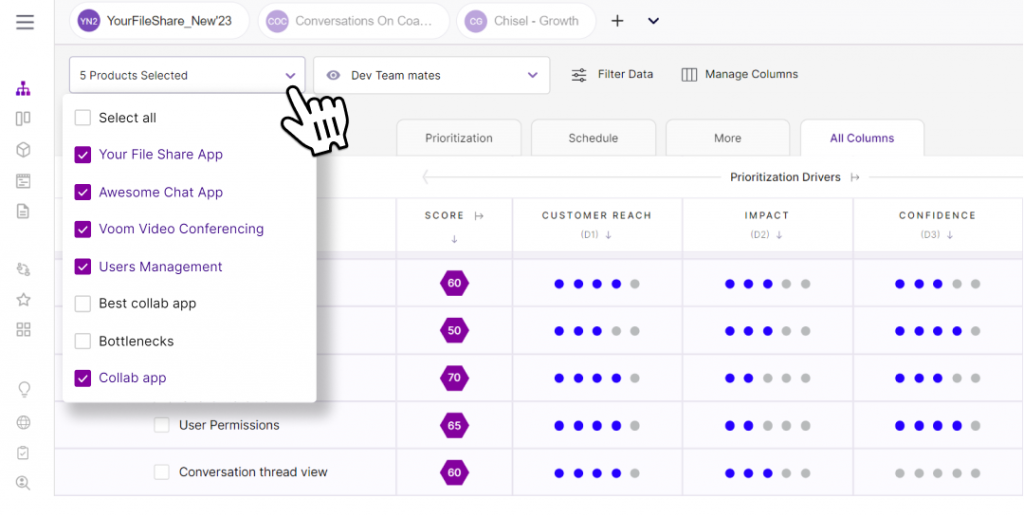
When too many products are visible, clutter and confusion are inevitable. With this tool, you can avoid that. Select one or more specific products when discussing/planning.
- Go to Treeview
- At the top left corner of your workspace, expand the products.
- Click on the relevant check boxes.
Convert features and sub-features
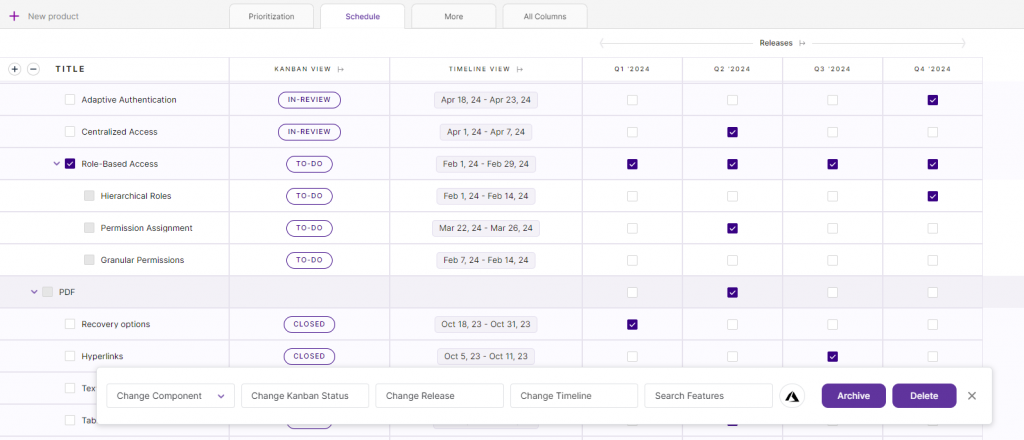
You can move the items in your feature treeview all while maintaining their parent-child hierarchy.
- Click on the checklist box next to the feature
- Now, select the component from the ‘change component’ bar
- Your features and sub-features have been moved to the new component.