Share Roadmaps with Team Members
Collaborative roadmapping is the way to keep your team engaged in the journey.
Planning, saving, and sharing the features’ progress with relevant persons is important to know that everyone is on the same page. Chisel’s Save and Share tool helps you to filter out and share only the part concerning that individual/ team and not bombard them with loads of information.
Filtering and Saving View
Your current configuration is captured when you save a view, which can be useful for later referencing or sharing with teammates.

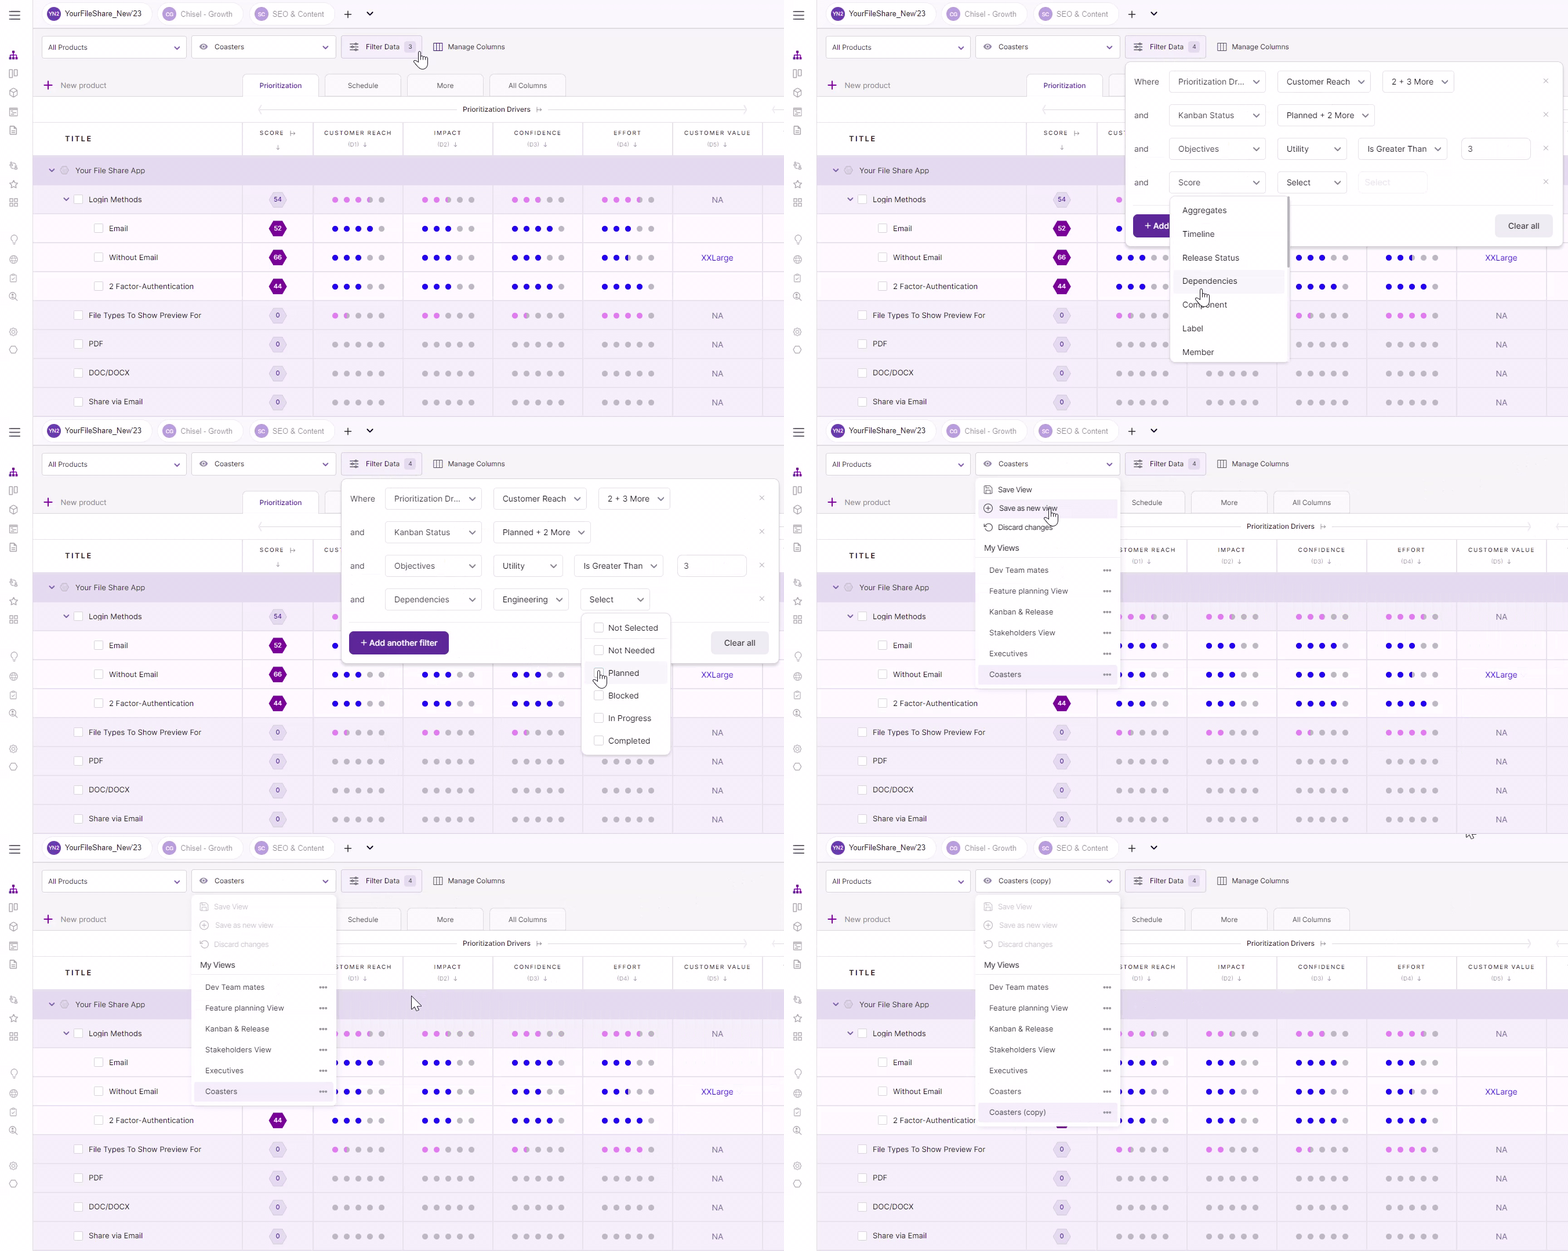
- In Treeview, on the top left corner of your workplace, click on ‘Filter Data.’
- Here, filter the features as per their score, statuses, and other factors.
- The ‘Manage Columns’ button allows you to toggle between making the columns visible and invisible.
- Once you filter out all the necessary data, you can expand the ‘save view‘ tab to view all the options.
- Click on ‘Save view’ to save your existing view with the latest changes.
- However, if you wish to add a new view, click on ‘Save as new view.’ This will allow your existing view to be saved as a new view with the latest changes.
- If you wish to discard the latest changes, hit the ‘Discard changes’ button.
A view captures the following configurations:
- The columns you are showing
- Filtered features
- The way features are sorted, e.g., prioritization score
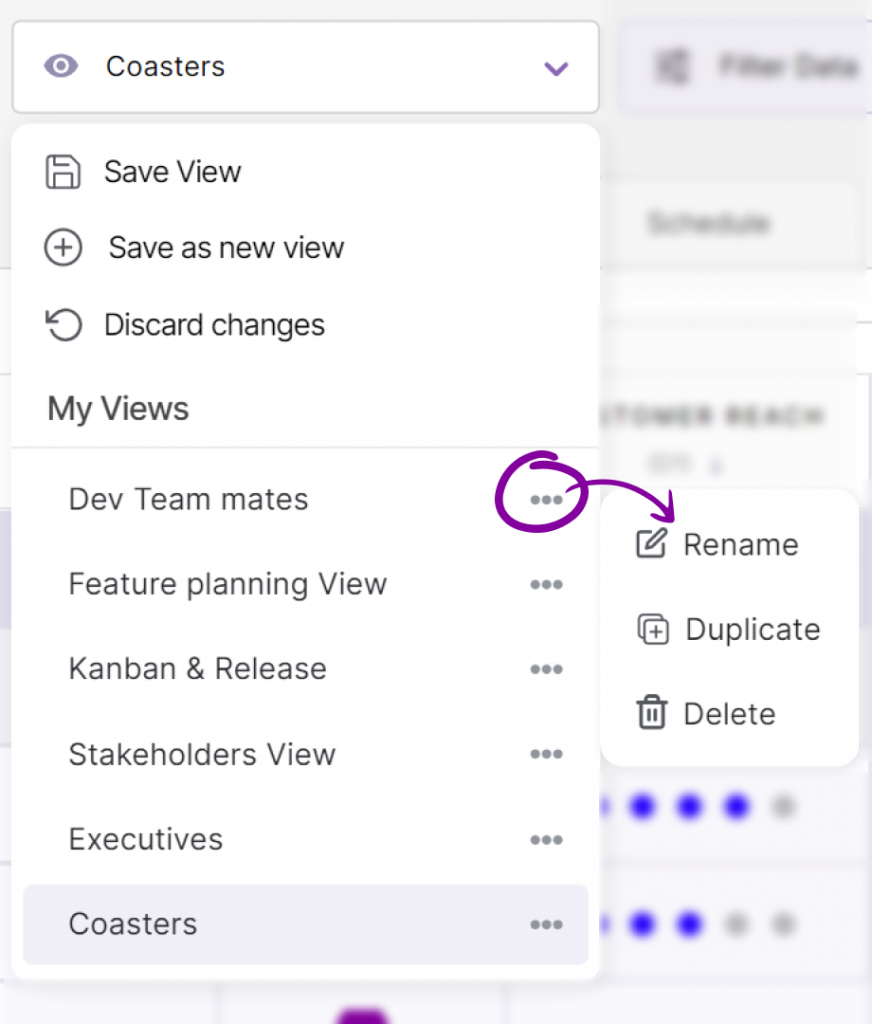
Rename, Duplicate and Delete a View

In your saved view list, additional options exist for renaming, deleting, and duplicating the view.
Note: Changes you make to a particular view will also be reflected for everyone with access to the view.
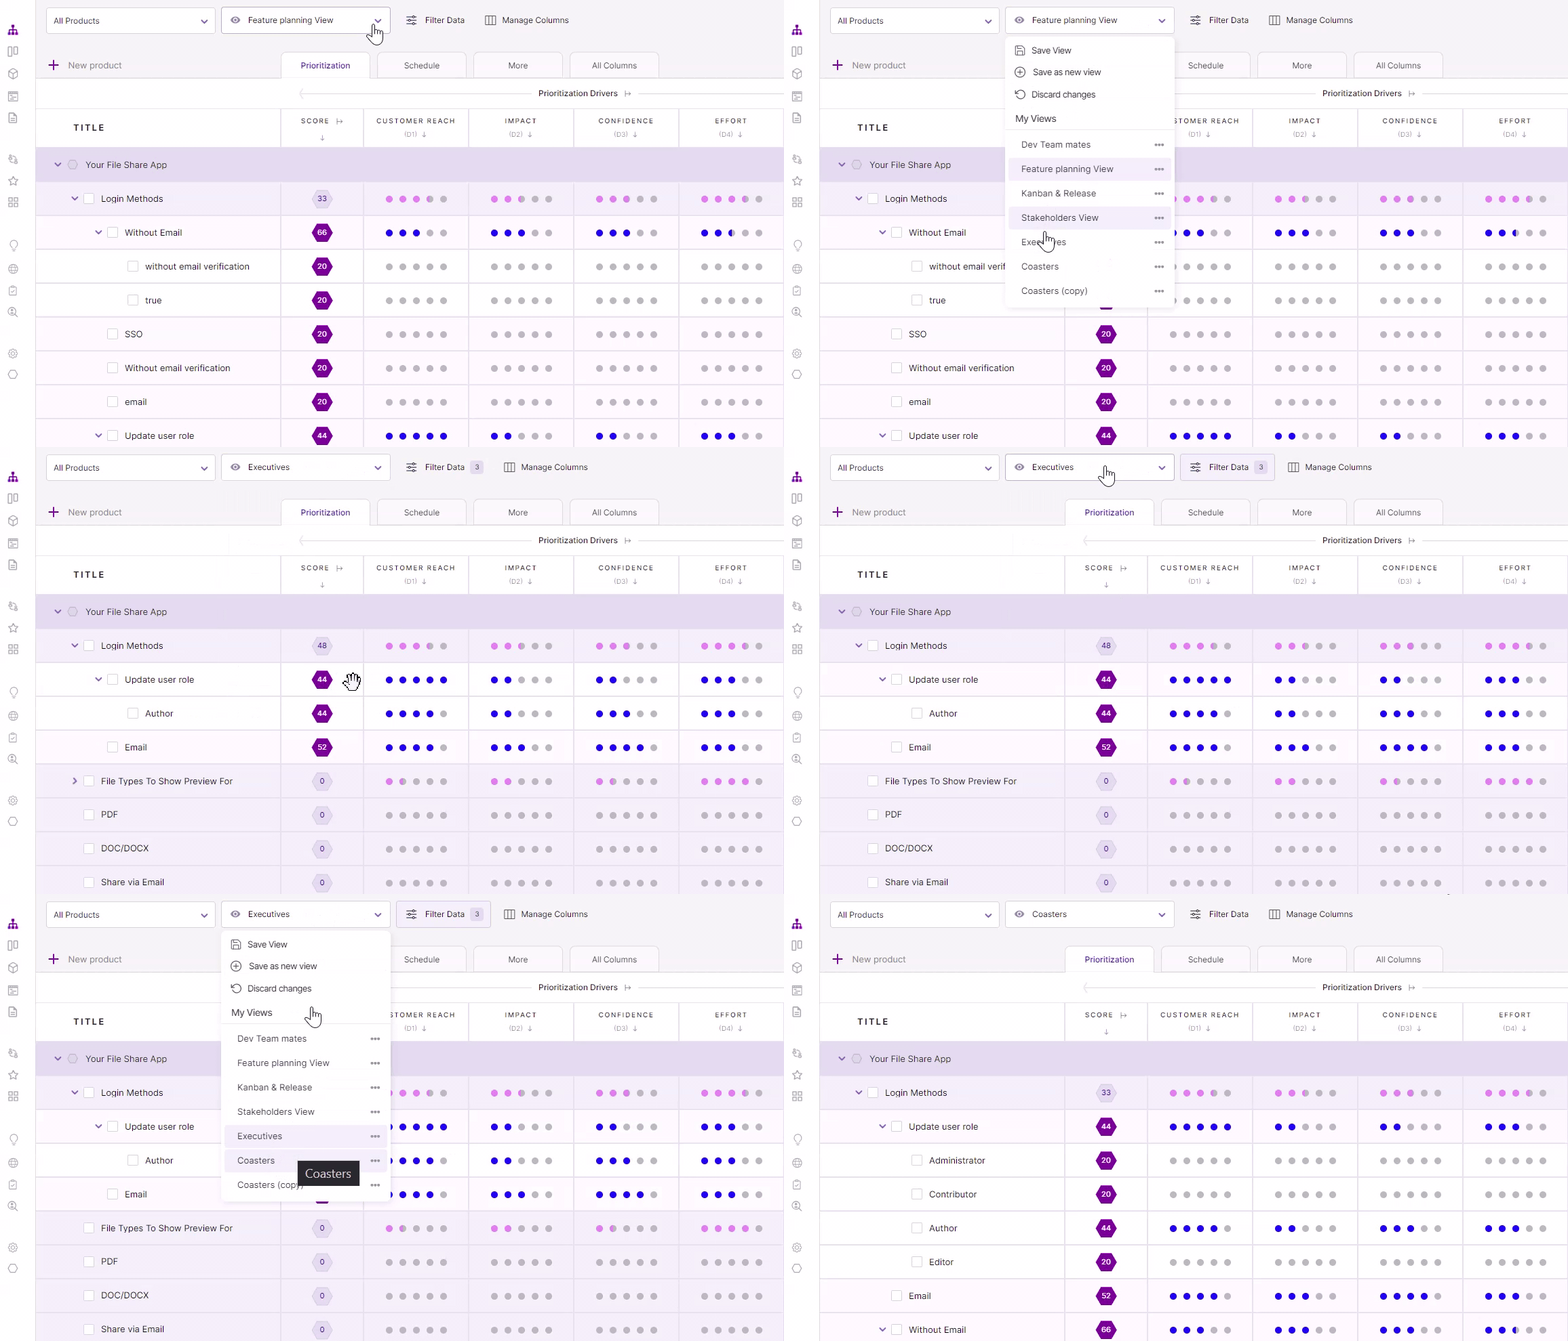
Toggling Between Views

Switching between views is easier by searching the view’s name and clicking on it.
Sharing the Saved View
After you have saved the view, you can share it by copying the URL of your workspace.
Pinning the Views
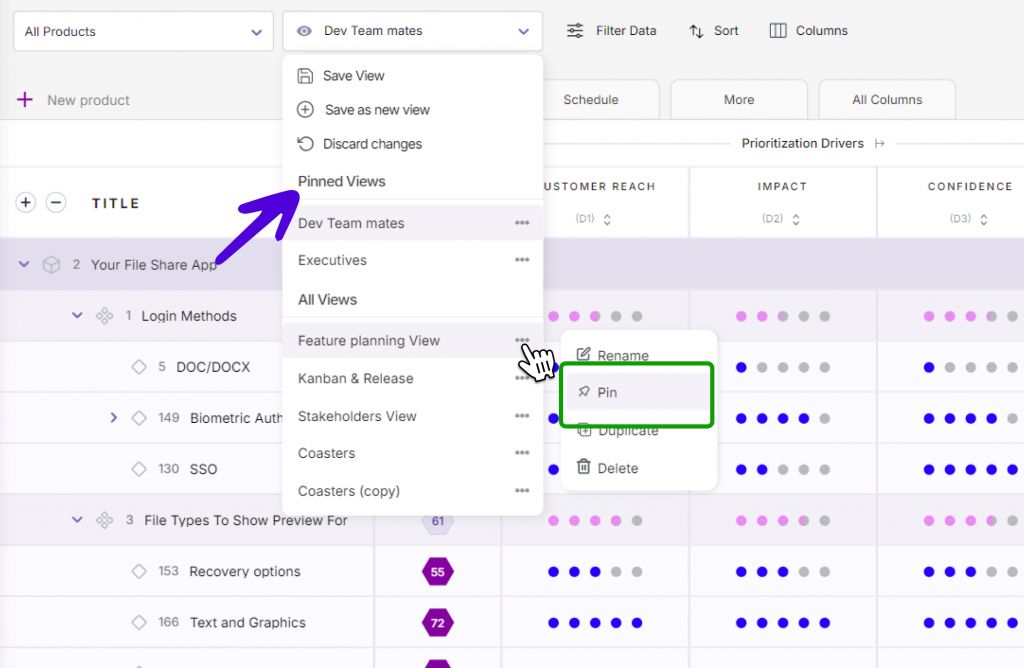
The Pinned View is a feature that allows you to access the most visited Treeview, Release, Kanban, Timeline and Idea Box Views at the top of the tool. This makes it easier for your team members to quickly access them without surfing through the entire list.
How to Pin a View?

- Locate the pin view by opening the three-dot menu
- To revert to the regular saved views, and remove the view from the pinned section, click on unpin.
- To manage the pinned views, look at the top of the views. All your pinned views will be displayed here.
Related Articles:
