How to Use the Release View
This article covers:
Chisel’s release view allows users to easily visualize their release cycles and which features will belong to each release cycle.
Release Landing Page
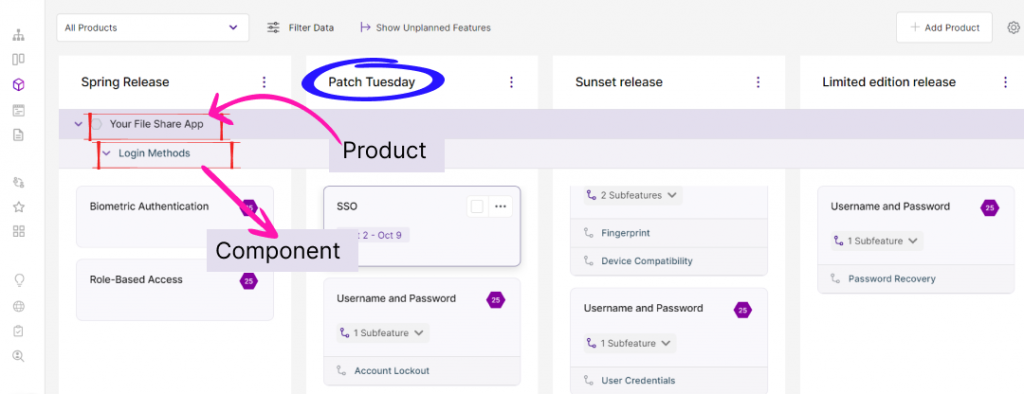
- Upon clicking the release view on the left, you will be placed on a screen with various releases shown on the top header.
- Also, the various components that make up your product will be on the right below the headers.
- All the features for the product will be in the same release that you placed them inside the treeview.
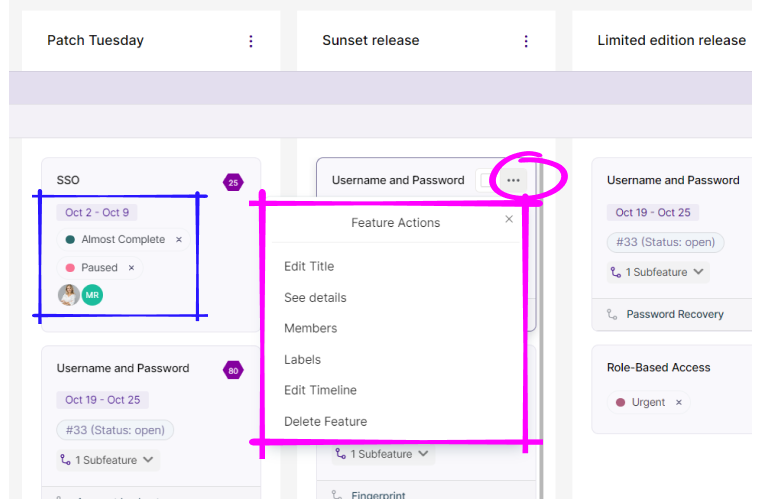
- For feature actions like editing the title of features, etc, click on the ellipsis.
- Any end dates for features, labels, and people working on the feature will be easily visible.
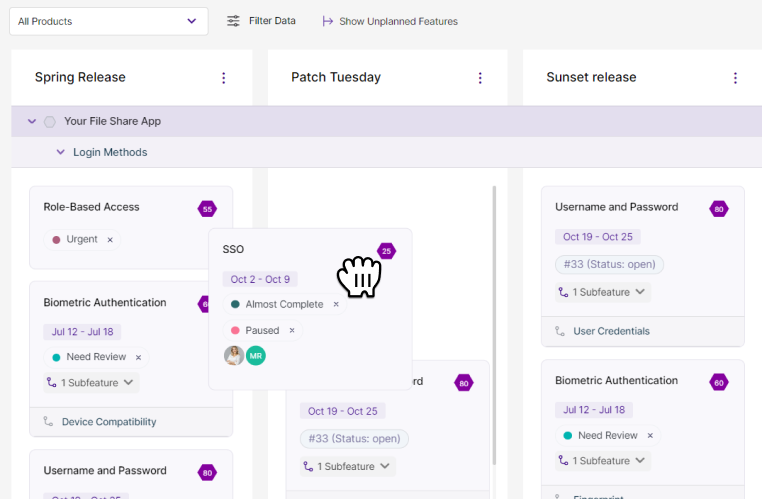
- You can easily drag features between releases if you want to move a feature up or down releases.
- Clicking on a feature will result in the side panel with the same functionality as the one in the treeview and the Kanban view.
Adding a Release
From Treeview
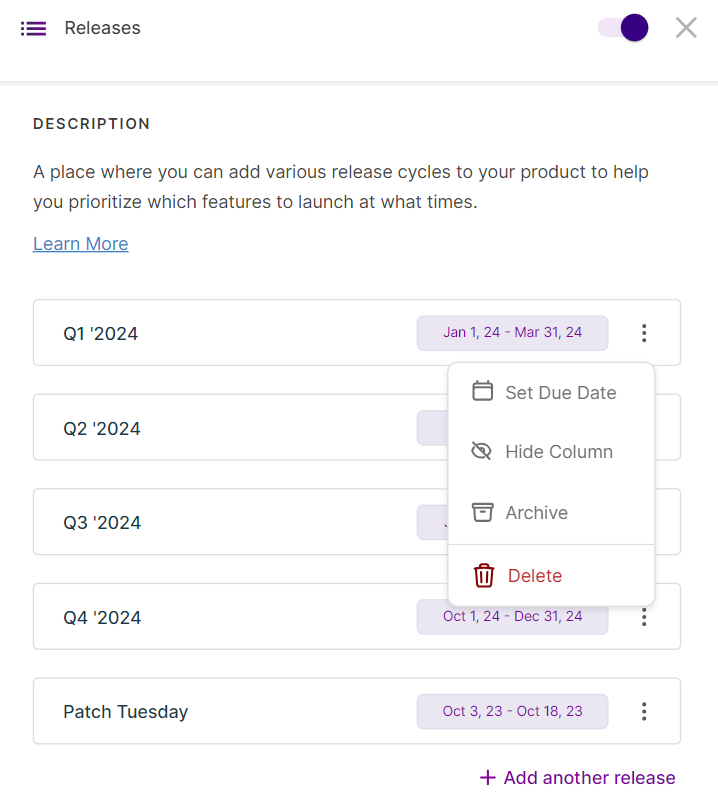
- You can add a release by clicking on the ‘add another release‘ button at the bottom after all the current releases.
- Once you do, a text field will appear, letting you type the release’s name.
- Once you choose a name, hit Enter and the release will be finalized.
- A few things to remember when mapping:
- A feature can have multiple releases assigned.
- A sub-feature will have only a single release assigned
- When you select a release for a sub-feature, it will automatically assign the release to its corresponding feature as well.
From Release View
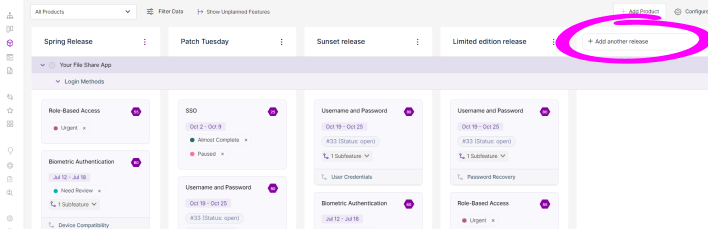
- Click on +Add another release
- Enter the Release title
- Press Enter or simply click outside the box
Rearranging a Release
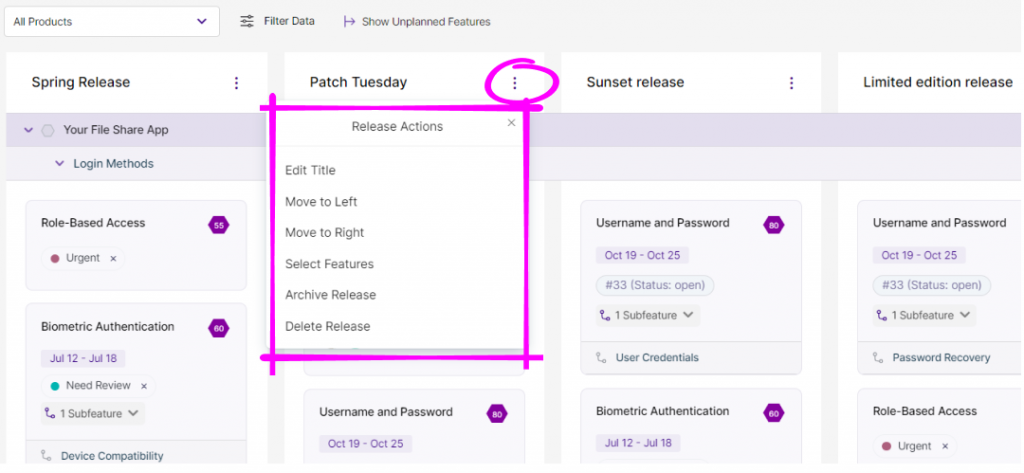
- If you want to move your releases from right to left or vice versa, you can easily do that too.
- Go to any release title, and click on the edit icon to open the tab with all the ‘Release Actions.’
- Once here, you can click on ‘Move to Right’ or ‘Move to left‘ based on your requirements.
- Accordingly, you can see the changes in your release view.
Related Articles: