Chat and Generate PM Documents Using the PM Agent
This article covers:
a. How To Begin a New Chat?
b. How to Generate a Document from Chat?
c. Editing Documents
d. Collaborate With Your Teams on the Doc
e. Other Actions
– Set the Tone of the Document
– Give Company Context
– Sources
– Link to Features
– Render Ideas and Features in the Doc
– Add Tables and Images
We’ll look at how to start a chat and generate a document using the various tools available inside the PM Agent, like templates and files.
How To Begin a New Chat?
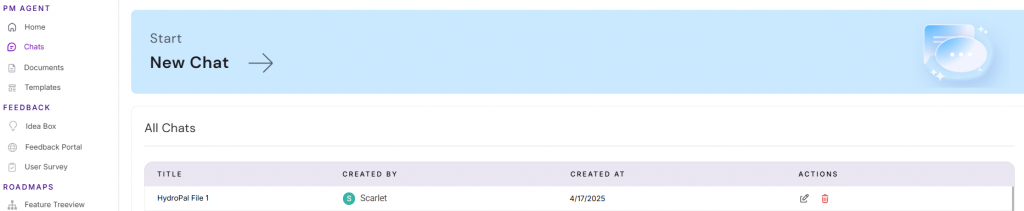
- Start the new chat from the dashboard by clicking on the Chats button.
- Click on Start New Chat
3. Here, select the existing suggestions or enter your requirements to get started
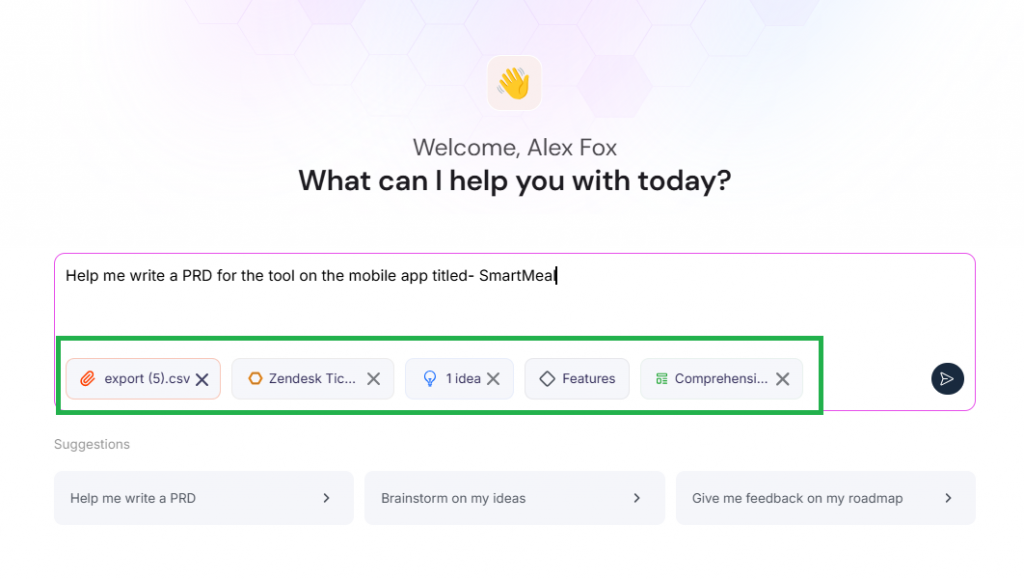
4. Attach any of the following items to give more context to the Chat Assistant:
– A file Attachment– supports PDF, CSV, .docx
– Tools like Zendesk, Intercom, Salesforce, Confluence & Google Drive
Learn more about which tools you can connect
– Ideas from your Idea Box
– Features from the Treeview
5. Pick/Choose a Template to generate the document in a defined format.

NOTE: A Starter pack allows for five chats at a time. You’ll need a paid Starter edition to avail of more benefits. A Chisel Enterprise subscription is required to link Ideas and Features when using the PM Agent.
6. Chisel’s PM Assistant is at work now.
7. You can begin chatting and inputting more keyword-specific requirements to get you the right documents.
How to Generate a Document from Chat?
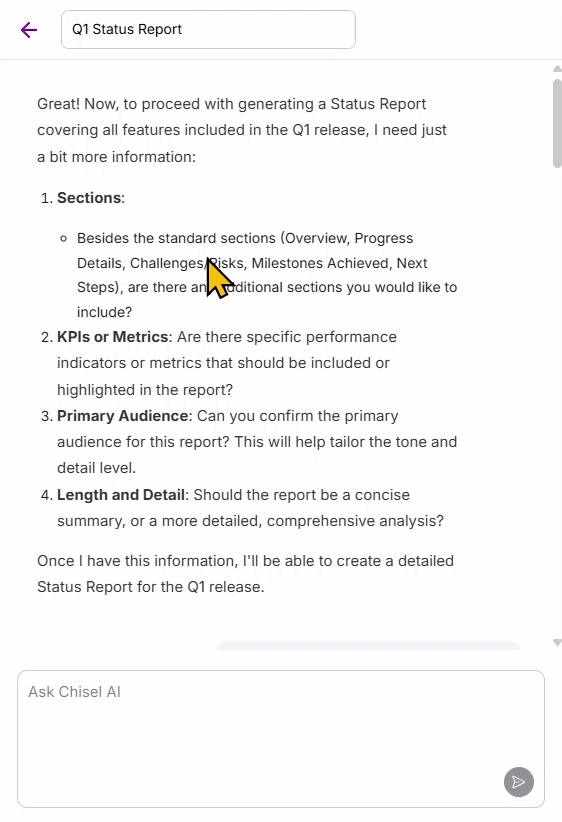
In order to generate a document from a chat, a PM/user needs to provide clear instructions with related data. If the user instructs the PM Agent to create a document without providing any data, it will ask for more information.
Instructions like “Generate a PRD for a weather application” do not contain context within themselves, so the PM Agent may ask for some detailed pointers.
If you attach features and then instruct “Generate a PRD ” to the agent, it will generate a document for you.
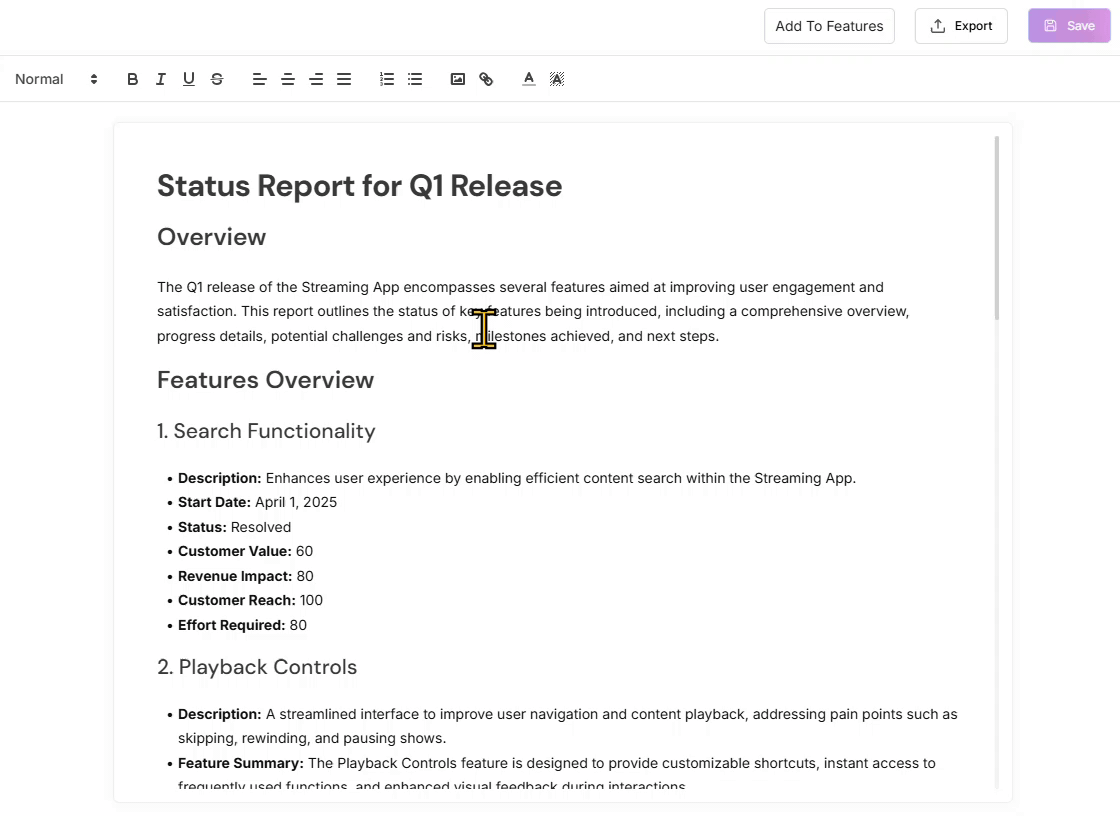
Below, we share an example of how a document is created with the chats.
Editing Documents
To switch to the edit mode of the document created by the Chisel Assistant:
- Go to the Documents on the dashboard
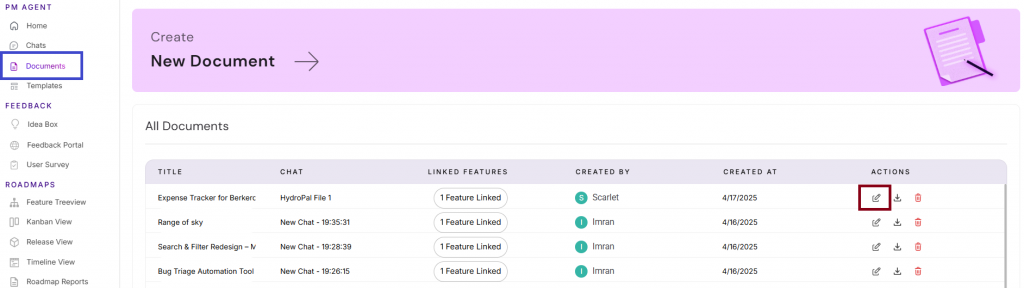
2. The Edit button brings you to the same screen as the Chats. Here, you can begin your ‘Ask Chisel AI’ journey again, make any changes to the font, attach any files, export, or link features
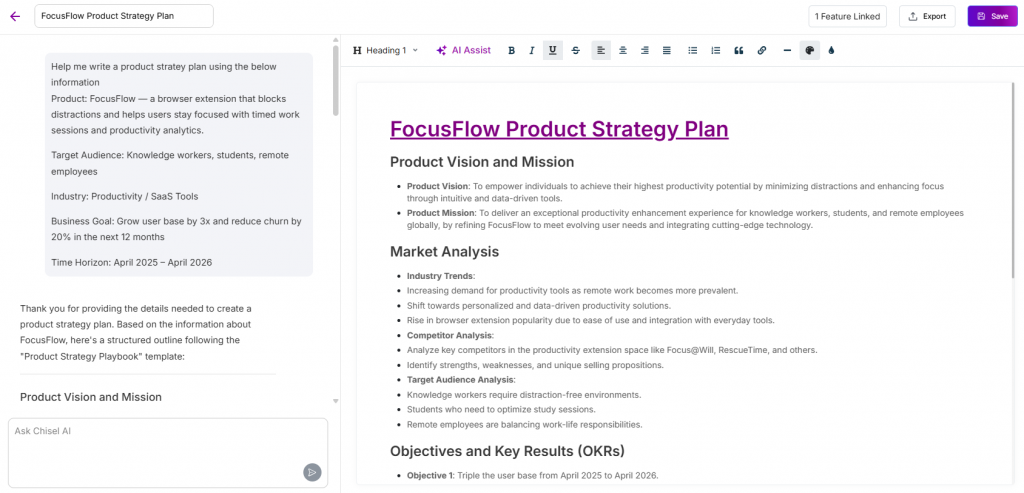
3. Finally, click on the Save button in the top right corner
Collaborate With Your Teams on the Doc
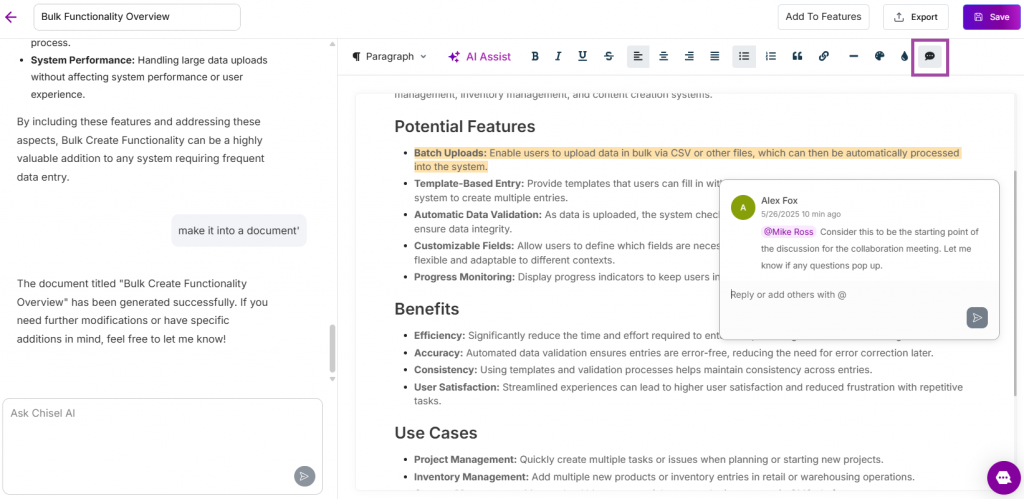
Add a comment suggesting any improvements to the document, asking essential questions, or simply pointing out the relevant part in the document.
Other Actions
Set the Tone of the Document
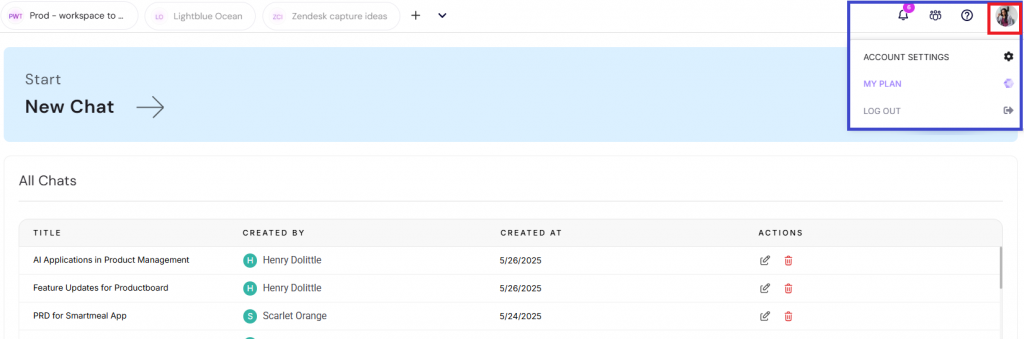
- Go to the Account Settings at the top right corner of the workspace
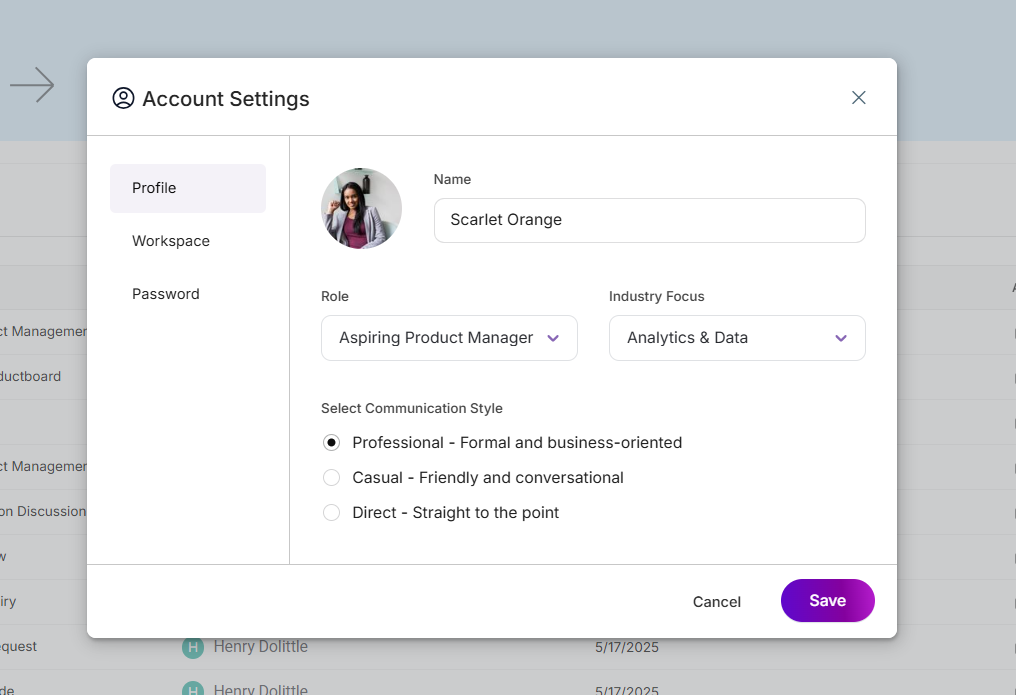
- Under the Profile, you have the option of setting your role, the industry you want to focus on, and the communication tone of the document generated.
Give Company Context
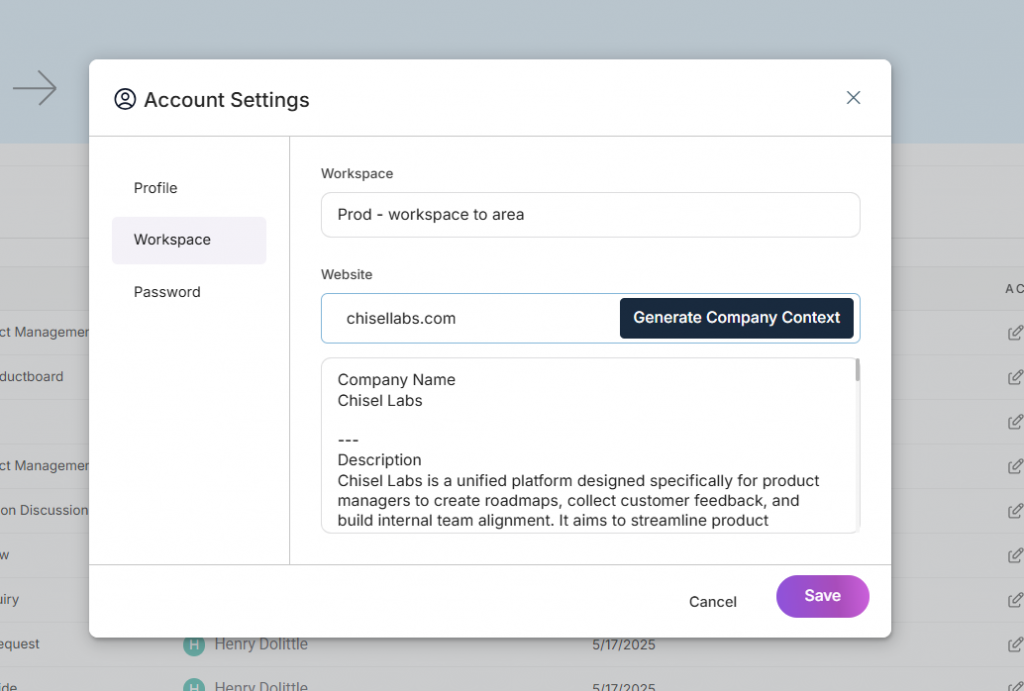
- Under the Workspace, you can search and save the company context for future use.
All this data is safely saved in your workspace, and helps you create a document that is tailored to the context you’ve provided here.
Sources
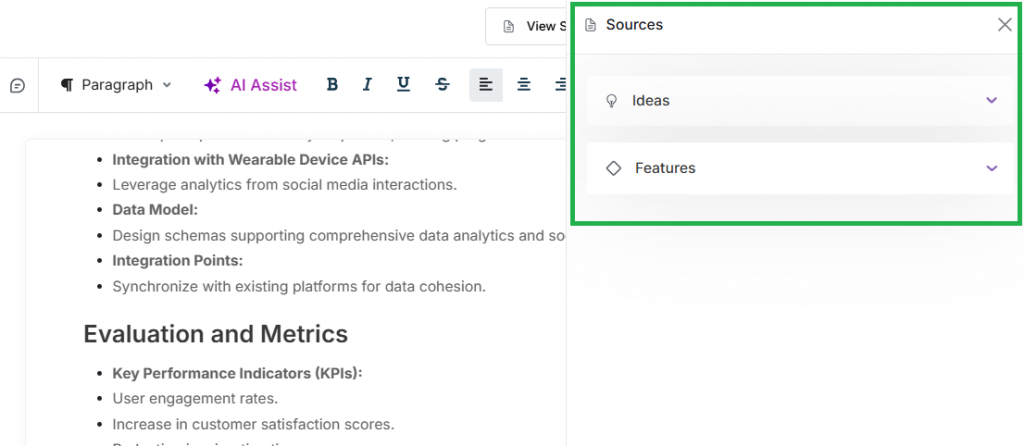
View the ideas and features you may have used/linked when creating a document under Sources and glance through them to keep tab.
Link to Features
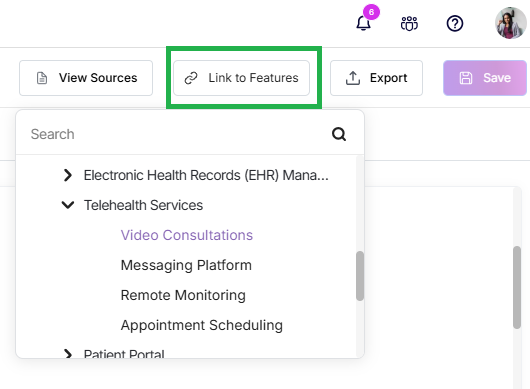
Link a document to certain features in your roadmap.
Render Ideas and Features in the Doc
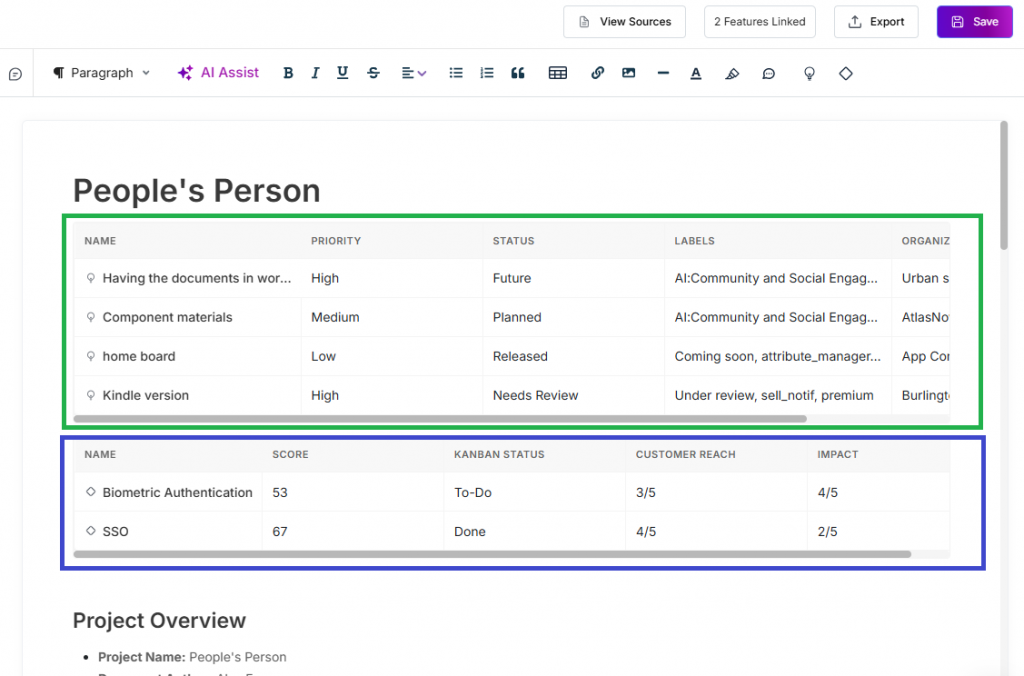
You can add ideas and features to the document by selecting them and then choosing the metadata you want the table to contain, such as name, status, organization, etc.
Once you’ve added the table, you can individually open each item and make changes to it in the side panel, which will be reflected in the table.
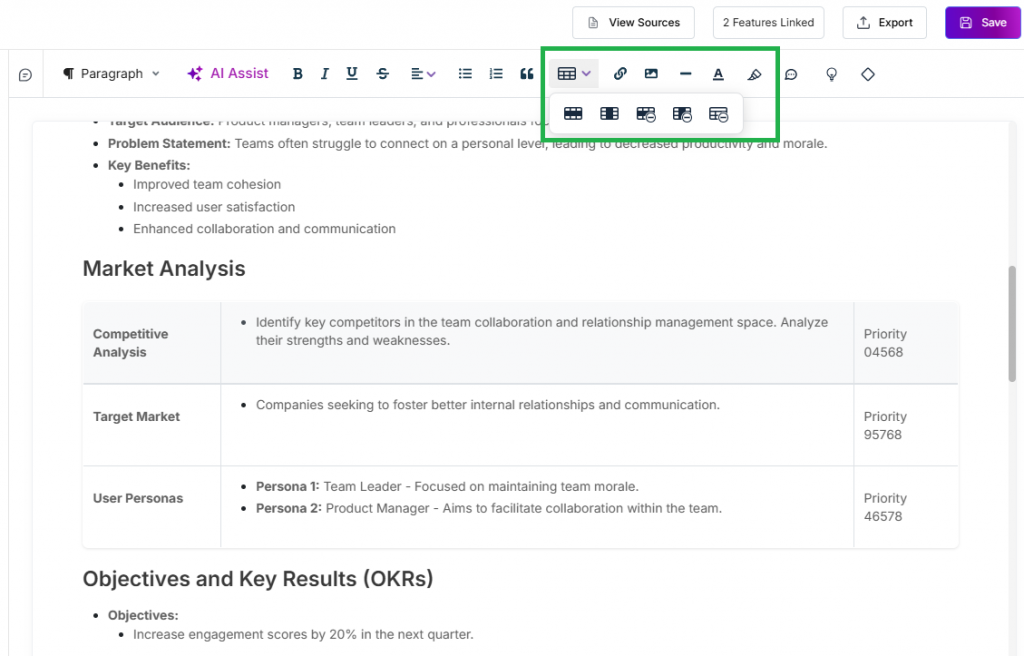
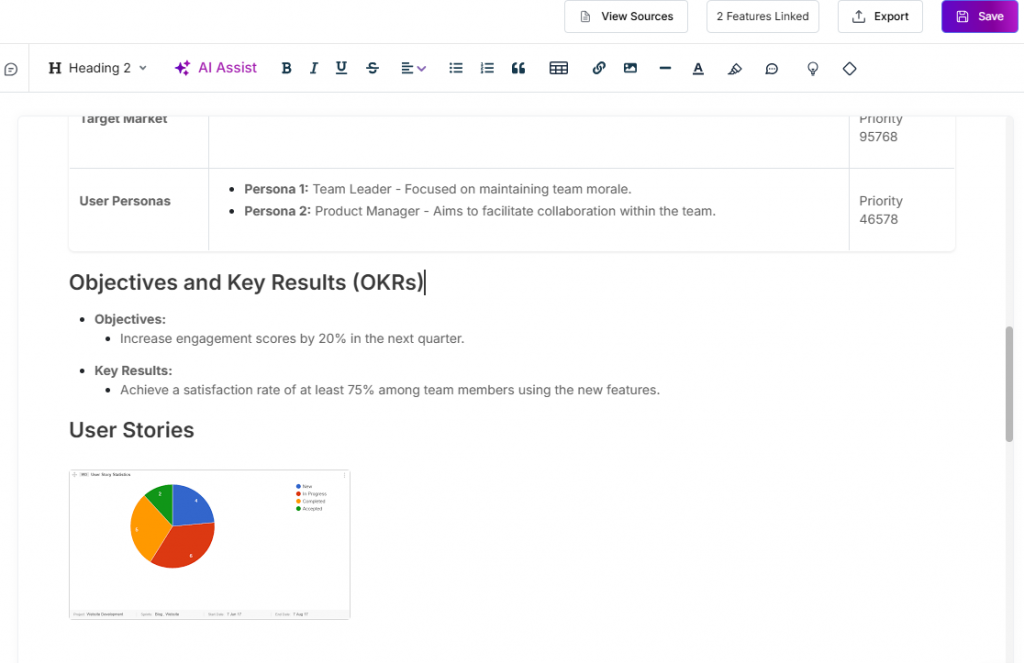
Add Tables and Images
Add a table and images to the document to enhance the document and better format the information in a digestible way.