Azure DevOps Integration
Azure DevOps(ADO) provides developer services for allowing teams to plan work, collaborate on code development, and build and deploy applications.
As a product manager, you would like to know what is up with the developer services.
If you are already using both Azure DevOps and Chisel, Chisel’s Azure DevOps integration is the perfect tool for you to ensure that work items are synchronized between the two platforms.
Requirements:
To get started, you will need the following:
- Chisel’s premium account with Admin maker rights
- An Azure DevOps account, a project & “Project Administrator” access in Azure DevOps
Note 1: A Chisel account with contributor access can’t proceed with any integration process. Learn more about the Chisel user roles.
Note 2: A User who is setting up the Chisel/ADO integration needs to be a “Project Administrator” for a selected project in Azure DevOps.
Authorizing Azure DevOps with OAuth2
When setting up an integration between Chisel and Azure DevOps, the first step is to authorize the integration between both platforms with OAuth2.
Follow the steps below to authorize the Azure DevOps integration with OAuth2.
- Click on ‘Integrations’ under the ‘workspace‘ pillar on the left navigation bar.
- Once you click on ‘Integrations,’ you will see a screen that shows you all the integrations you have set up(active integrations) and other integrations you can set up.
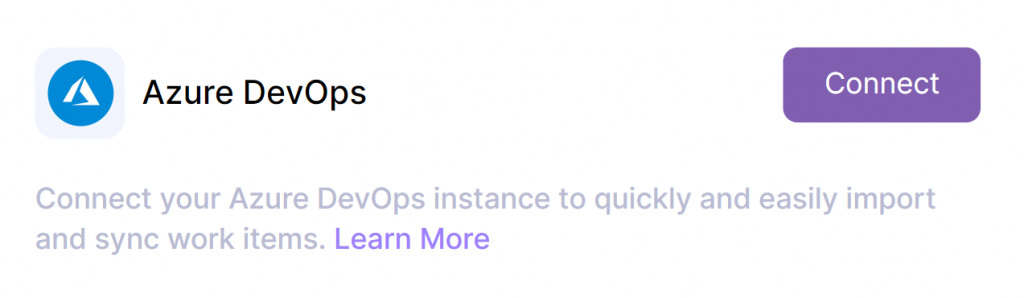
- Next, click on the connect button next to Azure DevOps.
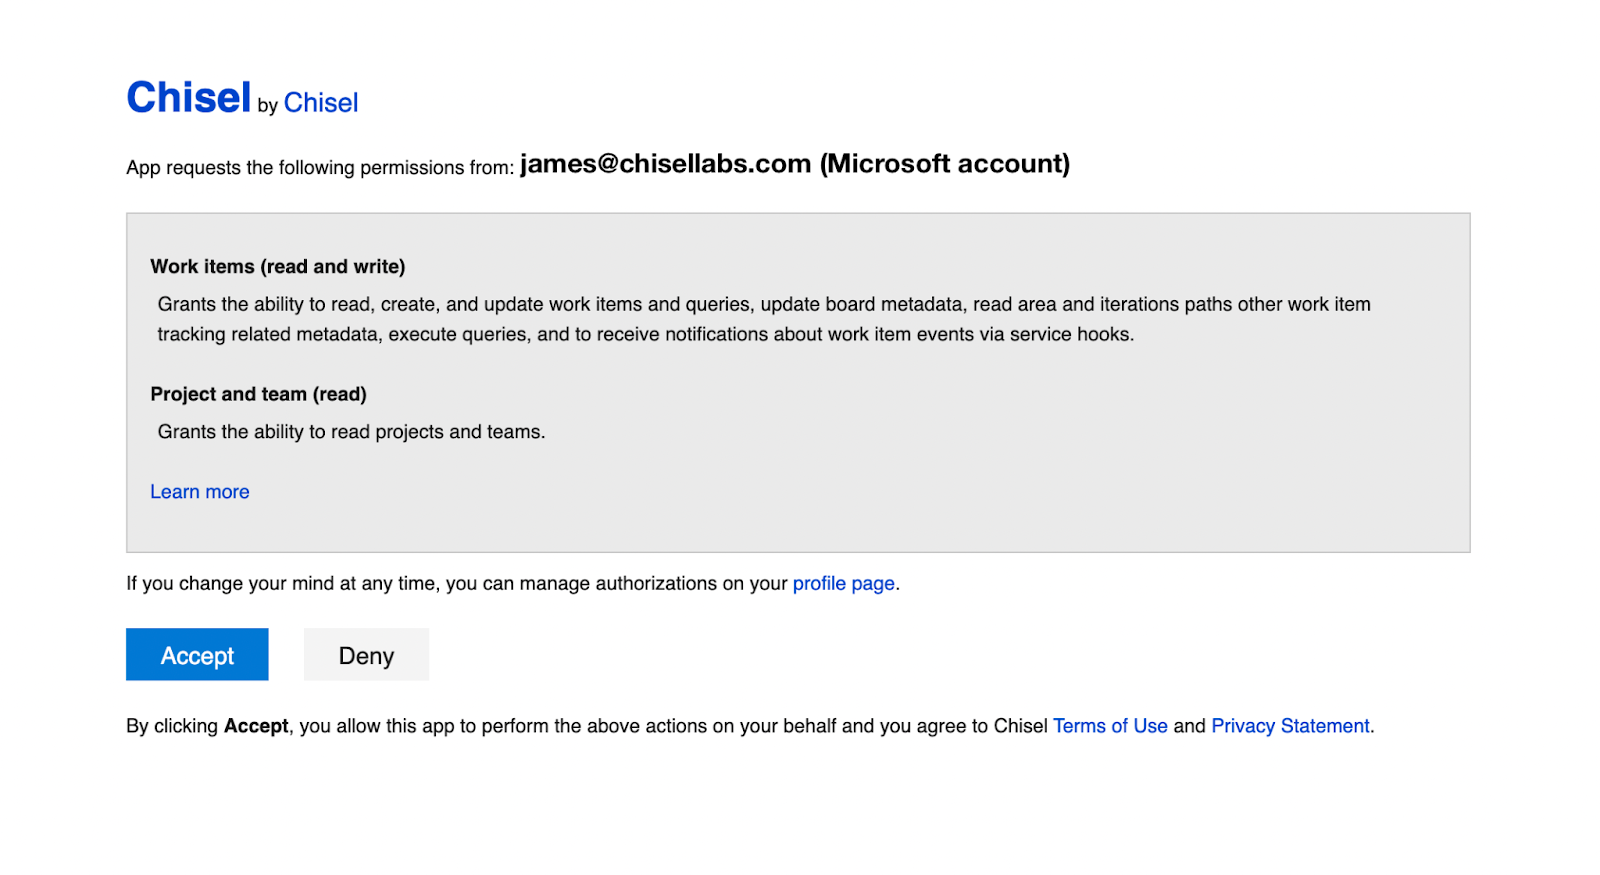
- If you have logged into Azure DevOps, you will come to a screen where you can see all the authorization-related access and Chisel requests for the Azure DevOps Integration.
- Scroll down and kindly accept the authorization by clicking on the ‘Accept’ button.
- If you haven’t logged into Azure DevOps, kindly log in and follow the above step.

- Now you will be navigated back to your Chisel workspace, where you will configure the integration as per your requirements.
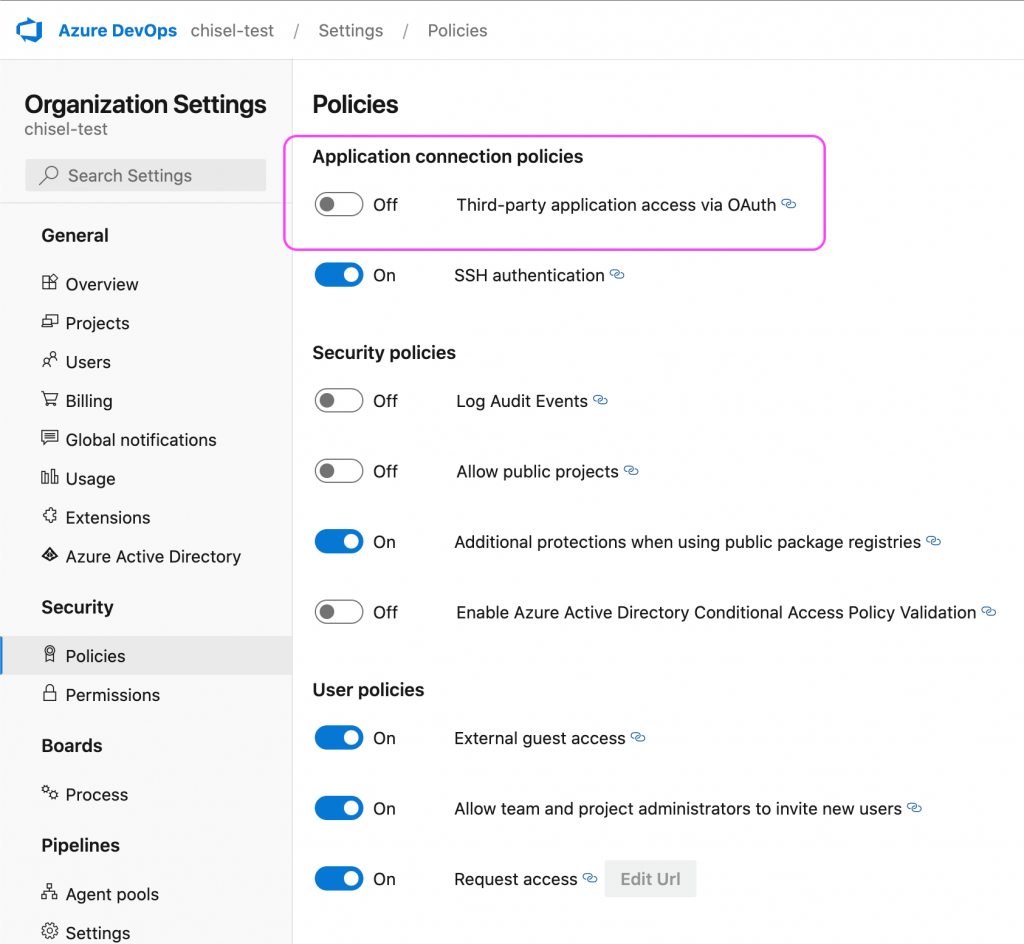
Pro tip: Make sure in ADO you have enabled the ‘Application connection policies tab‘ under ‘Organization Settings.’ Toggle on the ‘Third-party application access via OAuth.’
Standard Configurations
Now that you have authorized the integration, you will have to configure the integration.
Choose Azure DevOps Workspace & Project
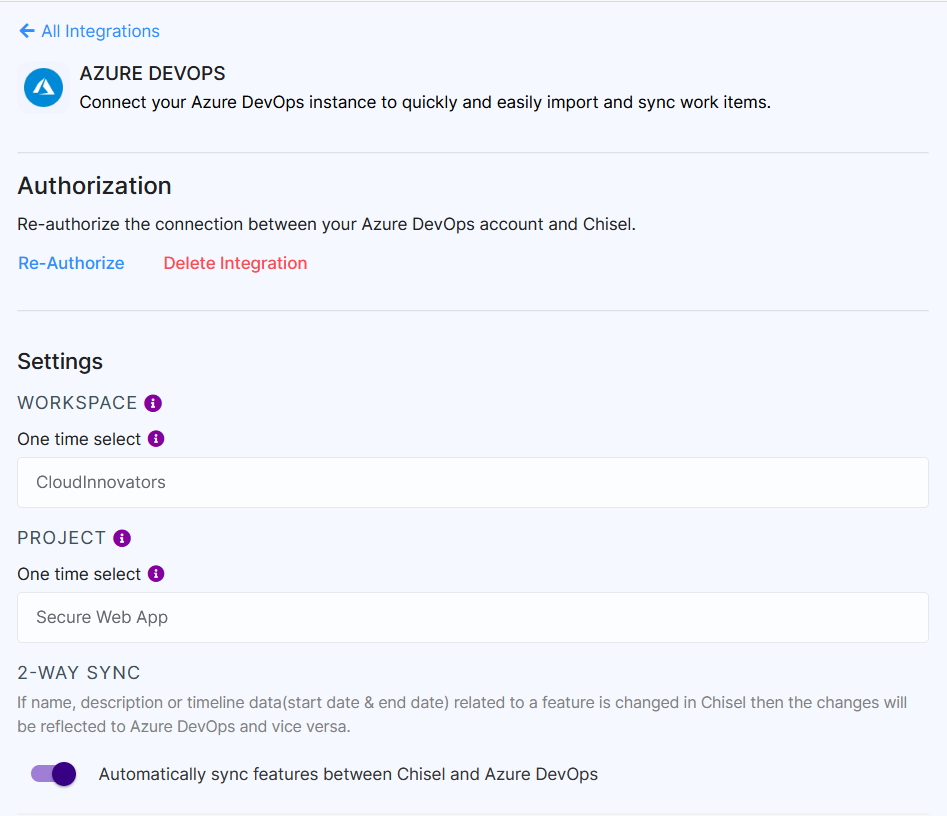
- The first step for configuring the Azure DevOps integration is to choose the correct organization and project from Azure DevOps which you want to integrate with.
Note: Ensure you have created a project in your Azure DevOps workspace.
- Once selected, click on ‘Save Project.’
Note: You cannot change the Organization and Project once selected. You will have to create a new integration for a different project.
Two-way sync

Two-way synchronization enables information to flow back and forth between Chisel and Azure DevOps.
- To enable two-way sync, kindly enable the toggle below the 2-way Sync.
- You can sync Chisel Feature and Component metadata(Status & Custom Fields) with Ado Epics(State & custom field)
Automatic Import From Azure DevOps
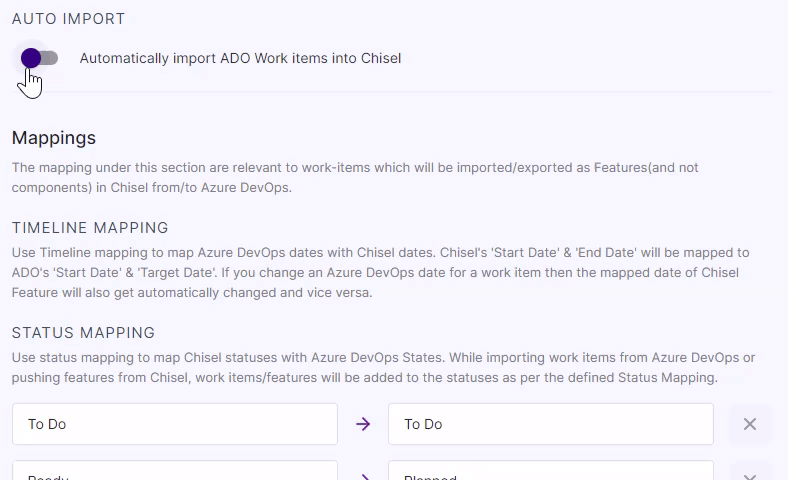
With this tool, your ADO work items will be automatically imported into your Chisel workspace.
- Toggle the button below ‘Auto Import.’
- Once you do so, you must configure ‘Destination’ and ‘Work Items’ as below:
- Under ‘Choose Destination – Product,’ select the Product from your Chisel workspace where you want the imported components to be created.
- Under ‘Choose Destination – Component,’ select the Epic/Component from your Chisel workspace where you want the imported features to be created.
- Under ‘Choose Destination – Feature,’ select the exact Epic/Feature from your Chisel workspace where you want the imported sub-features to be created.
- Under ‘Choose Work Item – Import as a Component,’ select the work items (part of the ADO workspace) from the list which you want to be imported as Components in your Chisel workspace.
- Under ‘Choose Work Item– Import as a Feature,’ Select the work items (part of the ADO workspace) from the list which you want to be imported as Features in your Chisel workspace.
- Under ‘Choose Work Item– Import as a sub-Feature,’ Select the work items (part of the ADO workspace) from the list which you want to be imported as sub-Features in your Chisel workspace.
Parent/Child Hierarchy

- Toggle on the ‘Parent/Child hierarchy‘ button to organize your Azure DevOps workspace based on your parent/child hierarchy in Chisel.
We will look at how to link the hierarchy in Treeview later in this article.
ADO – Chisel Mappings
The next step in the integration is to map different entities between Azure DevOps and Chisel, as terminology may differ between your Chisel workspace and the Azure DevOps project.
Default Mappings
- By default, the name, description, start date, and due date will be mapped automatically.
Status Mappings
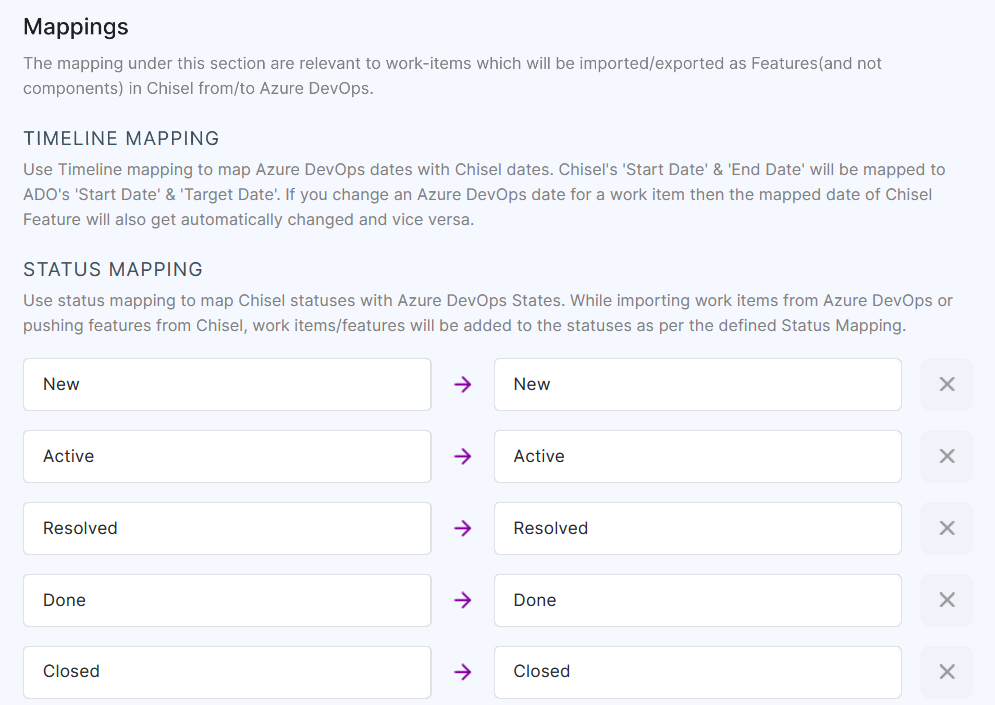
For both the status of a work item in the Azure DevOps project and the kanban status of a Feature and Component from Chisel to stay in sync with each other, you have to map them.
- For status mapping, you need to map the status from Azure DevOps with a Kanban status in Chisel. (Kanban status is available for both- the components and the features).
Label Mappings
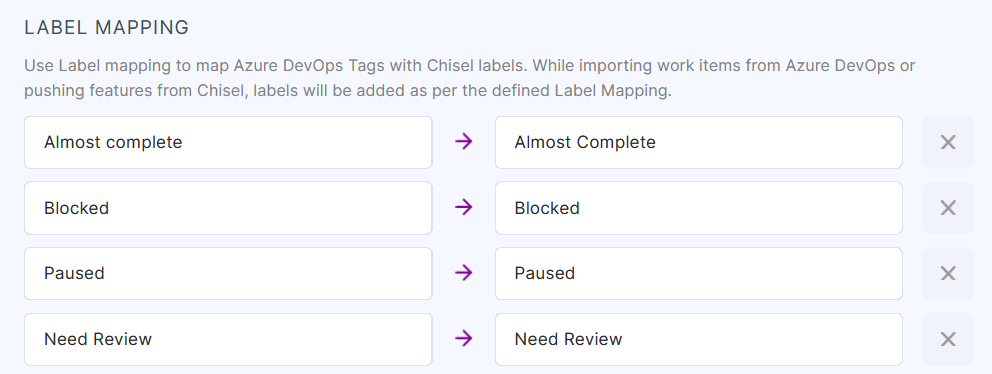
The labels you create in Chisel and the tags in Azure DevOps need to map to stay in sync.
- For label mapping, you need to map every tag from Azure DevOps with a label in Chisel.
- To sync, import and push the labels/tags at Chisel’s Component level, backend enabling is needed. Kindly contact support@chisellabs.com
- After completing the above steps, kindly verify all the inputs you gave and click on ‘Save Integration.’
Release Mapping
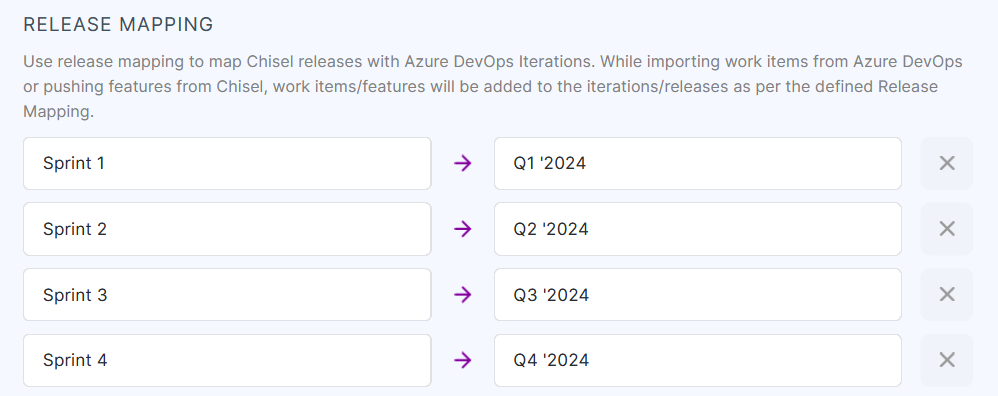
Release mapping is where you have to map Chisel releases with Azure DevOps Iterations. This release/iteration mapping will sync when you push/ import the features from Chisel and the work items from ADO.
The ADO iterations are on the left side, and the Chisel release mapping is on the right. Carefully select the mapping as per the requirement.
Custom Field Mapping
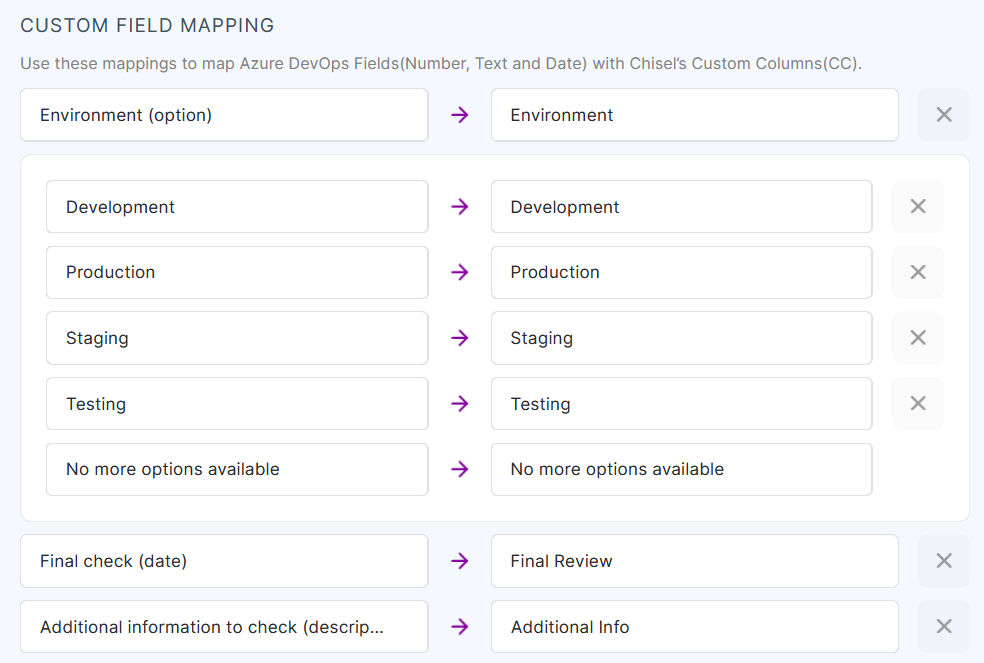
You can map custom fields in Azure DevOps((Number, Text, and Date) with the custom columns(CC) in Chisel so that they can be updated from anywhere and stay in sync.
Custom columns are handy numerical and categorical fields that allow you to add various additional information attached to the features in the roadmap.
- To map a custom column created in Chisel to a custom field in Azure DevOps, you need to create a custom field in ADO with a similar type.
- A ‘number’ type custom column must be mapped with a ‘number’ type custom field in Azure DevOps.
- A ‘text‘ type custom field must be mapped with a ‘text’ type custom field in Azure DevOps.
- While an ‘option’ type custom column needs to be mapped with a ‘dropdown’ type custom field in Azure DevOps.
Each of the options needs to be mapped with a dropdown value for sync to work seamlessly. - A Descriptive custom column in Chisel must be mapped with the Text (Multiline) Custom Field in ADO.
Note: Due to its nature, the descriptive custom columns will not be visible in the Treeview. However, you can view the details under the custom columns in the side panel.
Historical Data Sync
Suppose you have already imported a bunch of features to the Chisel workspace, but now you want to sync that one custom field from ADO that wasn’t previously added into Chisel.
You will have to create a custom column in Chisel and sync and save the integration. Chisel team will import the historical data.
Contact: support@chisellabs.com
Sync the Prioritization Drivers with ADO’s Custom Fields
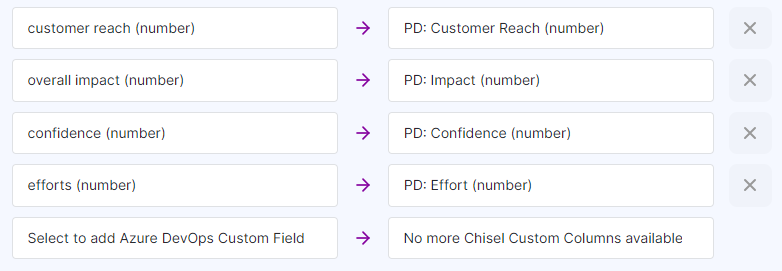
To keep the values of the Prioritization Drivers in Chisel for any Feature/Sub-Feature in sync with the values of the Custom Fields in ADO for any work item, map them under the Custom Field Mapping column.
Flat List Import
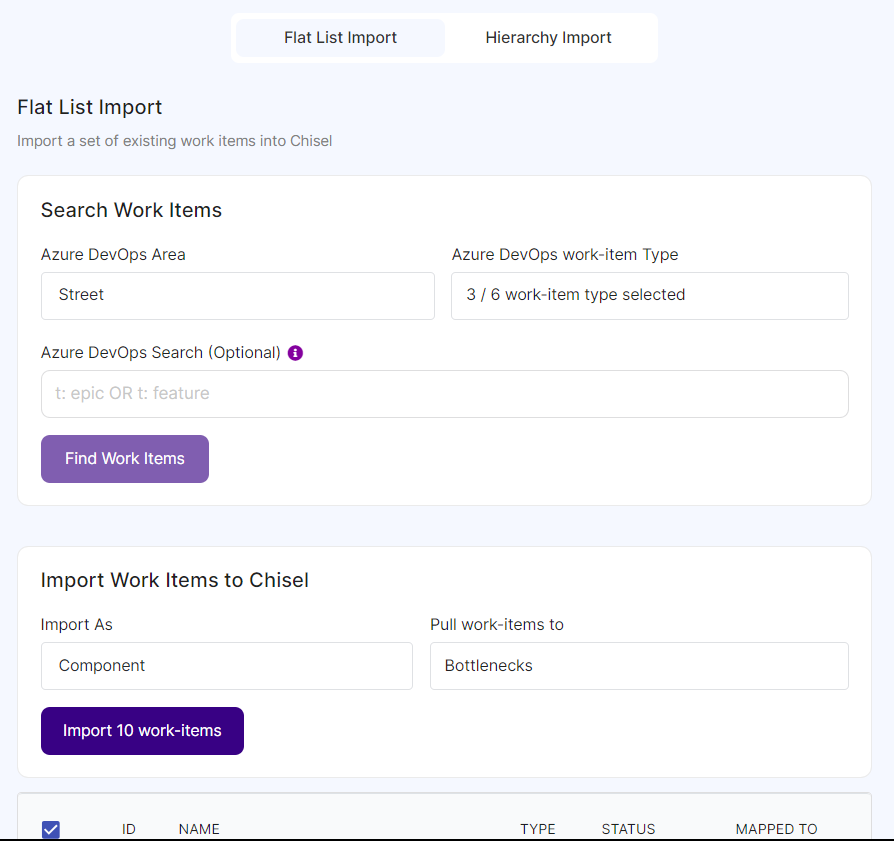
Apart from automatic import, Chisel also allows you to import the work items already in your Azure DevOps project to your Chisel workspace.
- Select the ‘Work Item Type’ you want to import into the Chisel workspace, rewrite the Azure DevOps Search query if required, and hit the ‘Find Work Items‘ button.
- The section below will show you all the relevant work items present in your Azure DevOps project.
- Now you can choose to Import your work items as a Component, Feature, or SubFeature.
- Import as: If you choose to import the work items as a Component, kindly select the Product from your Chisel workspace where you want to create the imported components. Likewise, if you choose Feature, select the component; if you choose a subfeature, select Feature.
- Click on the ‘Import work items‘ button.
Hierarchy Import
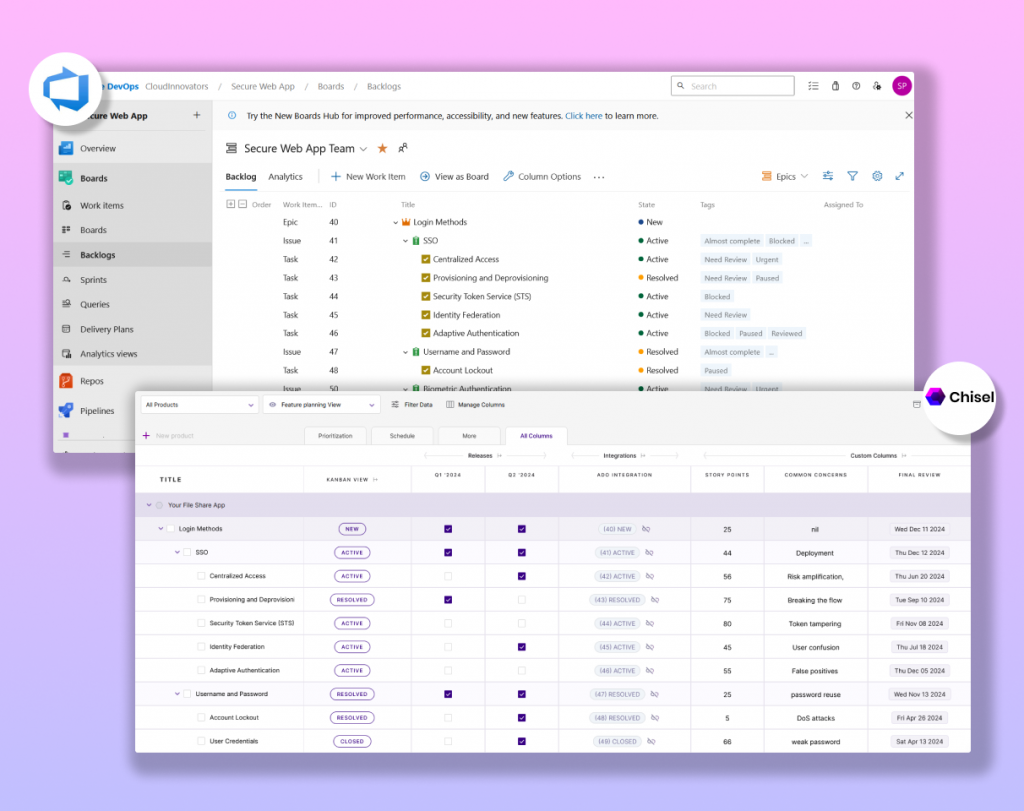
You can import your ADO nested hierarchies (parent/child relationship) (Eg. Epic–>Issue–>Task) into Chisel (Eg. Component–>Feature–>Subfeature) in just a few steps.
You simply have to select a relevant product under which to import these hierarchical work items. All the while maintaining the hierarchy of parent/child.
Find out how to go about importing your ADO work items while maintaining the hierarchy.
This is the end result:
How to Link Parent/Child Hierarchy?
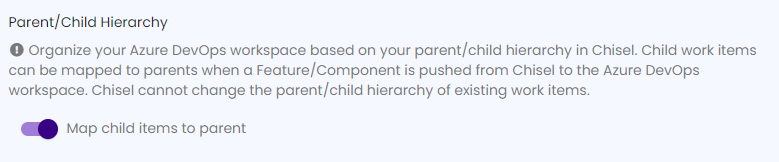
- Toggling on the button next to ‘Map child items to parent’ organizes your Azure DevOps workspace based on the parent/child hierarchy in Chisel.
Note: For simplicity, Parent/Child in Azure DevOps is synonymous with Component/Feature in Chisel, respectively.
Chisel Pro tip: Turning on the toggle before pushing work items into Azure DevOps is mandatory because Chisel cannot change the parent/child hierarchy once the items get pushed.
Linking the Hierarchy in Treeview
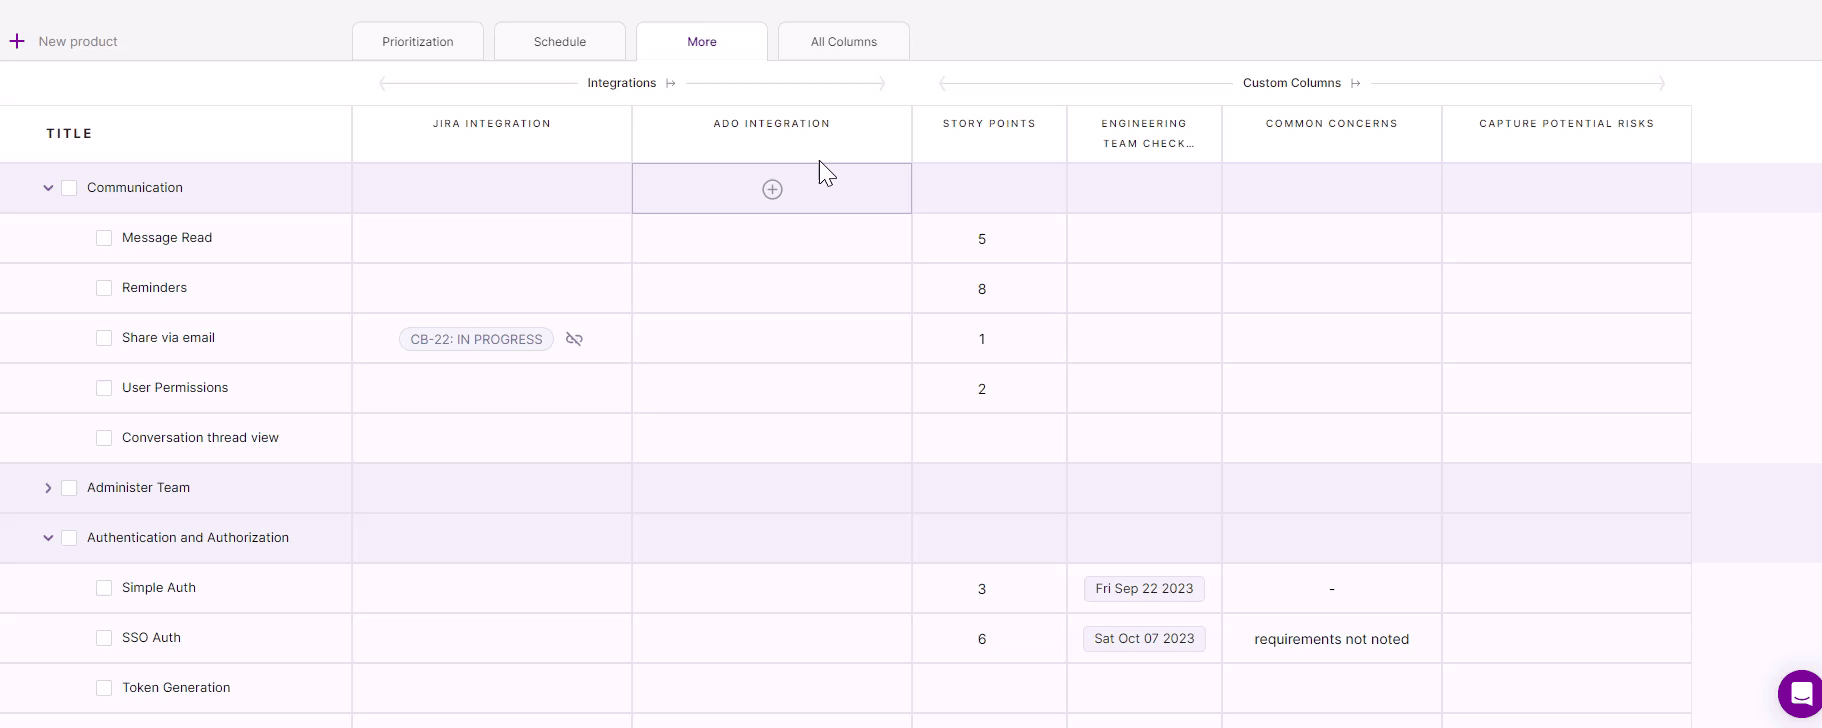
- Go to Treeview.
- Open the component or access the ADO integrations in the ‘More‘ tab.
- Link the ADO integration with the project by selecting the ADO WorkItem type.
- Follow the same process with the feature as well.